
Tips and Tricks for Trellising
The most common question I get in my DMs at least once a week is how do I trellis my Hoyas so I want to dedicate this blog to bring you guys into the whole process!
I think one of my favorite aspects of growing Hoyas is trellising; it is incredibly therapeutic for me and I get so excited each time there is new growth for me to pin down. As an avid collector for many years now, I have so many Hoyas in my collection that trellising really allows me to spend one on one time with a certain plant, admiring it’s beauty and noticing new growth. Honestly if you think about it, it is practically a form of art. The trellis is the blank canvas, the foliage in its different growth stages is your medium, and each plant clip act as a brush stroke to your artwork. There are so many different types and shapes of trellises we can pick from nowadays that I find it so much fun to pick and choose the best canvas for my Hoyas.
I love myself a good circle trellis for my Hoyas to turn them into lush wreaths but if you have been following me for a long time you know that I love myself a good Hoya tree so I tend to gravitate towards tall and narrow trellises for both aesthetics and space saving purposes. I like to use the same trellis for all of my Hoyas in my cabinets to keep them tidy and uniformed but I am always looking for fun and new trellises to use for my ambience plants. Because they grow outside of the cabinets, they have more room to expand, therefore I get to be more explorative when it comes to the shape and size I get to choose. When Treleaf reached out to me to do a collaboration I was incredibly excited to see that they offer vertical extendable trellis that essentially grows with your plants. How cool is that?!
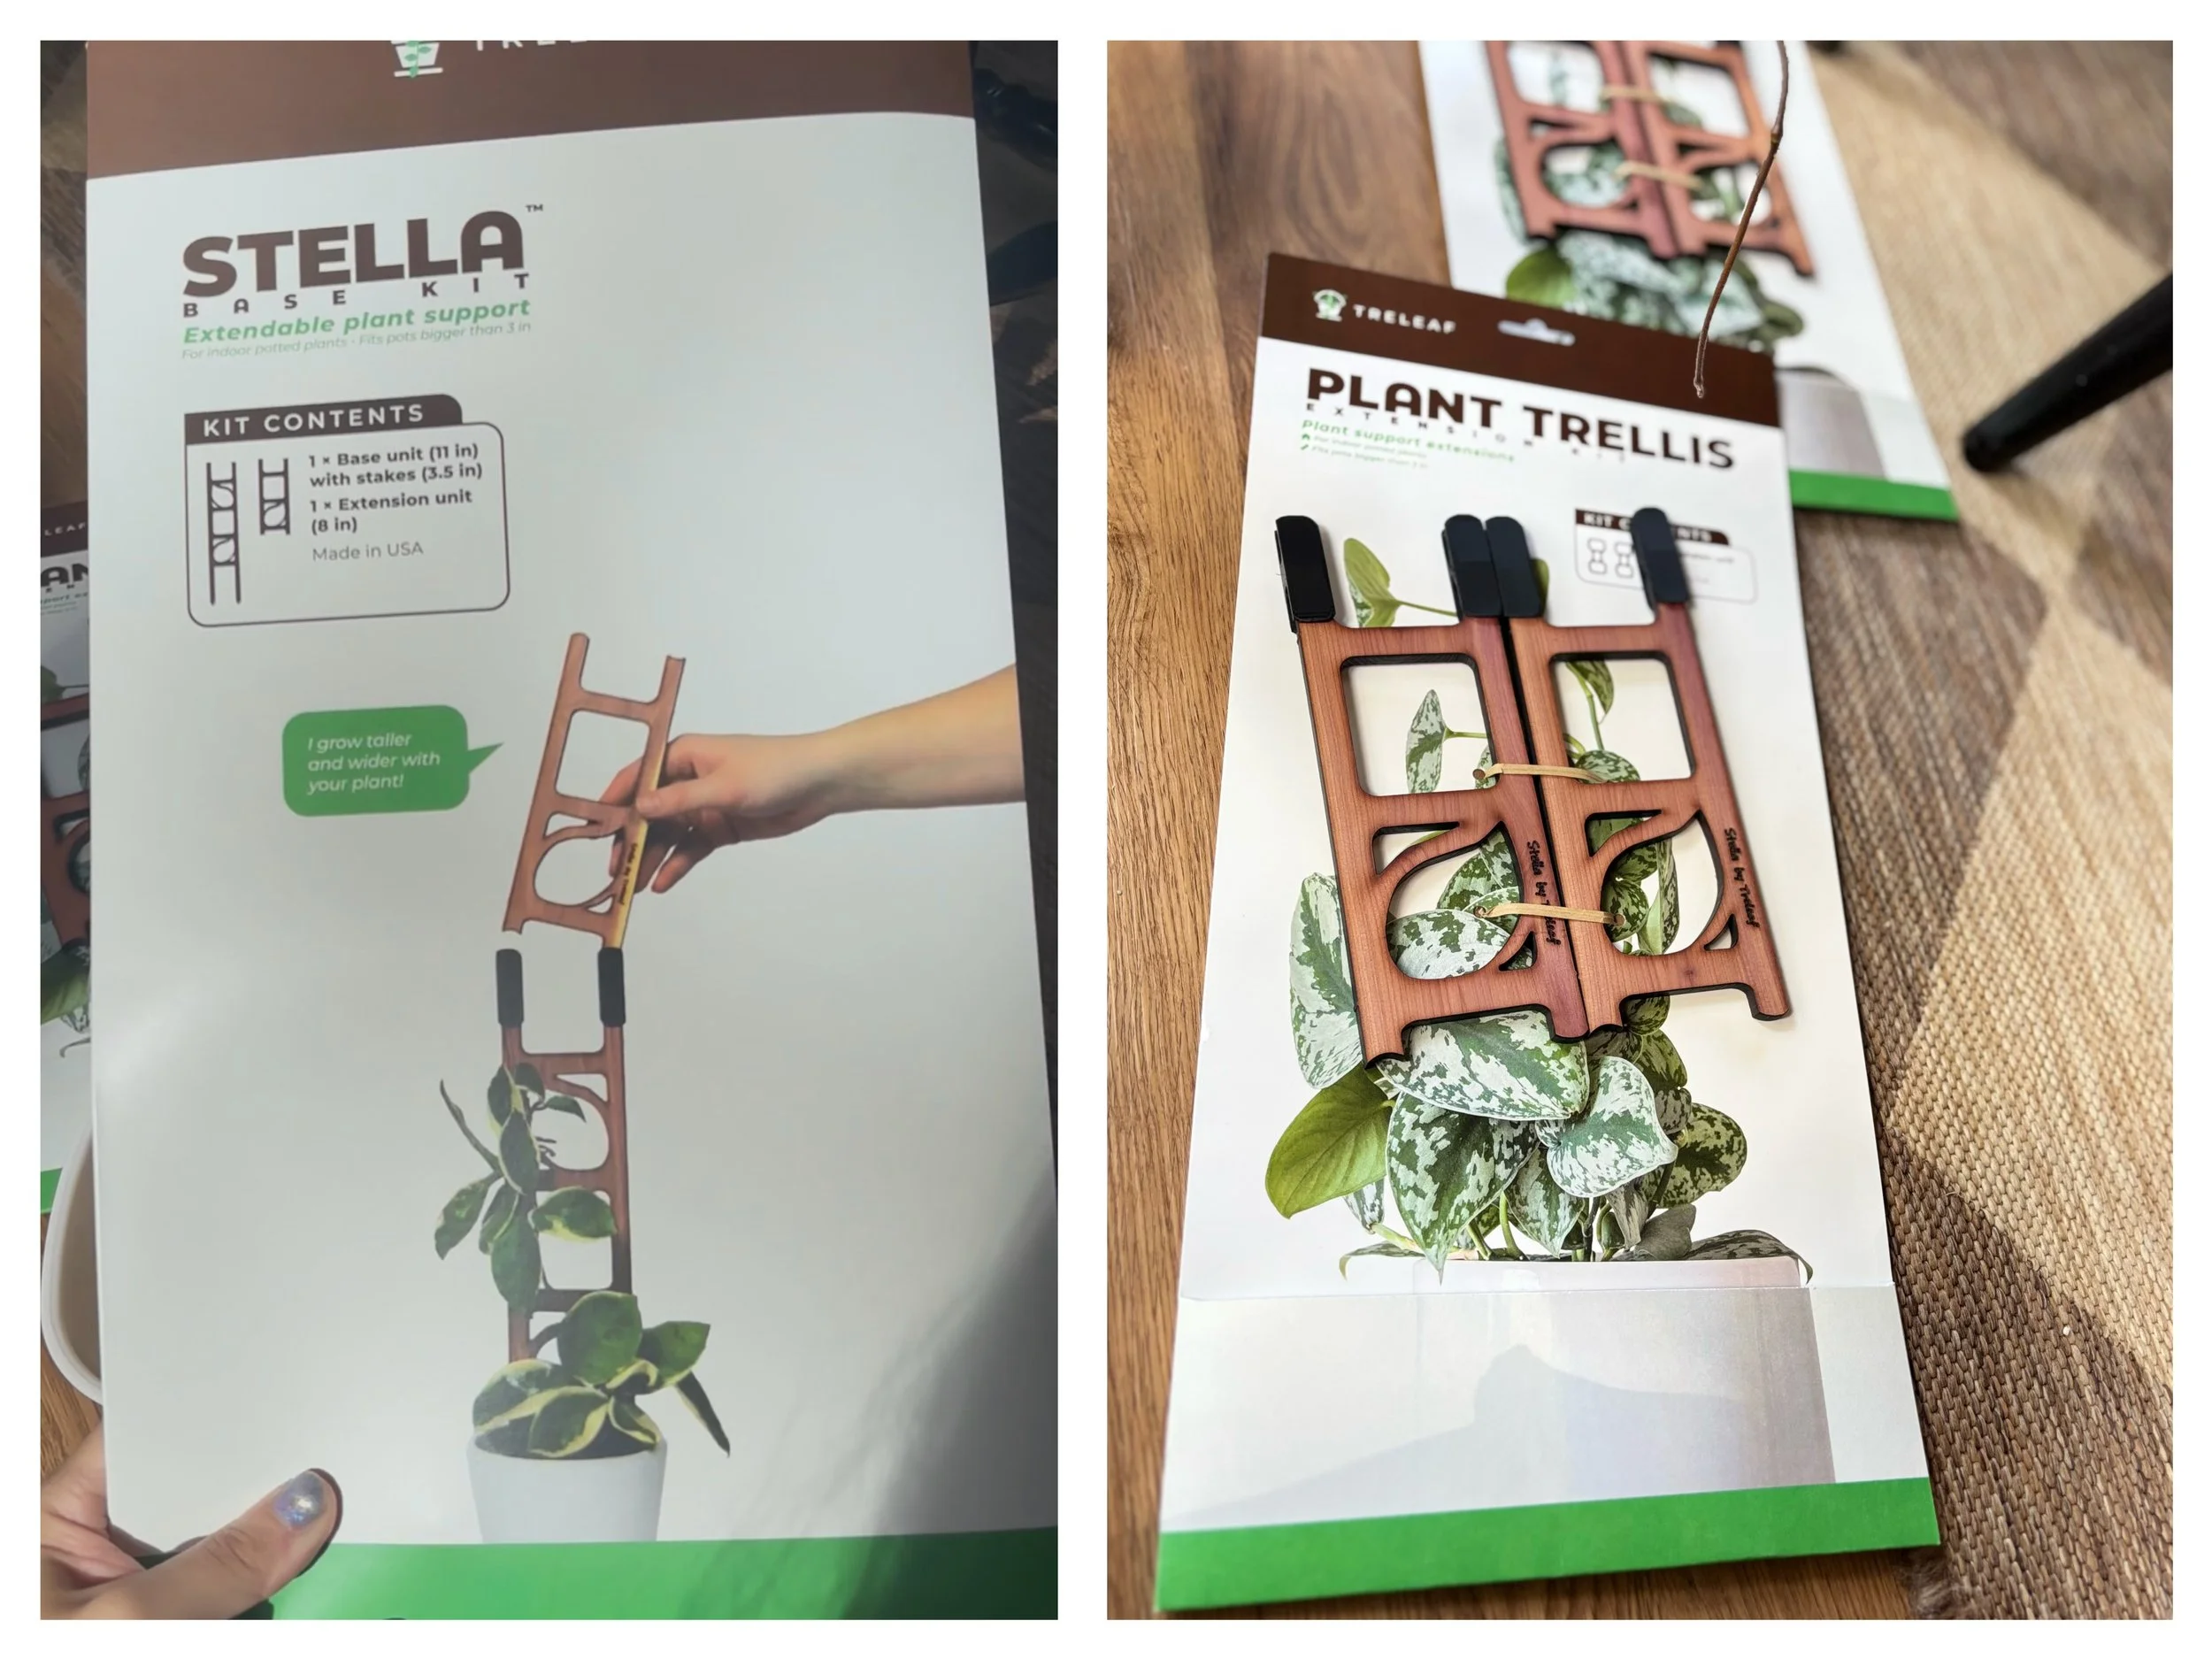
My favorite part about their Stella trellis is that you only need to buy one base kit for each plant and after that you can just add as many extendable supports as you wish. Treleaf is a woman-owned company, and as someone who really values sustainability, I was pleasantly surprised to see that every single aspect of the packaging is recyclable and compostable friendly, even down to the twist ties that keep the supports in place. The attention to protecting our planet is so respectable to me beyond the cool concept of the trellis itself.
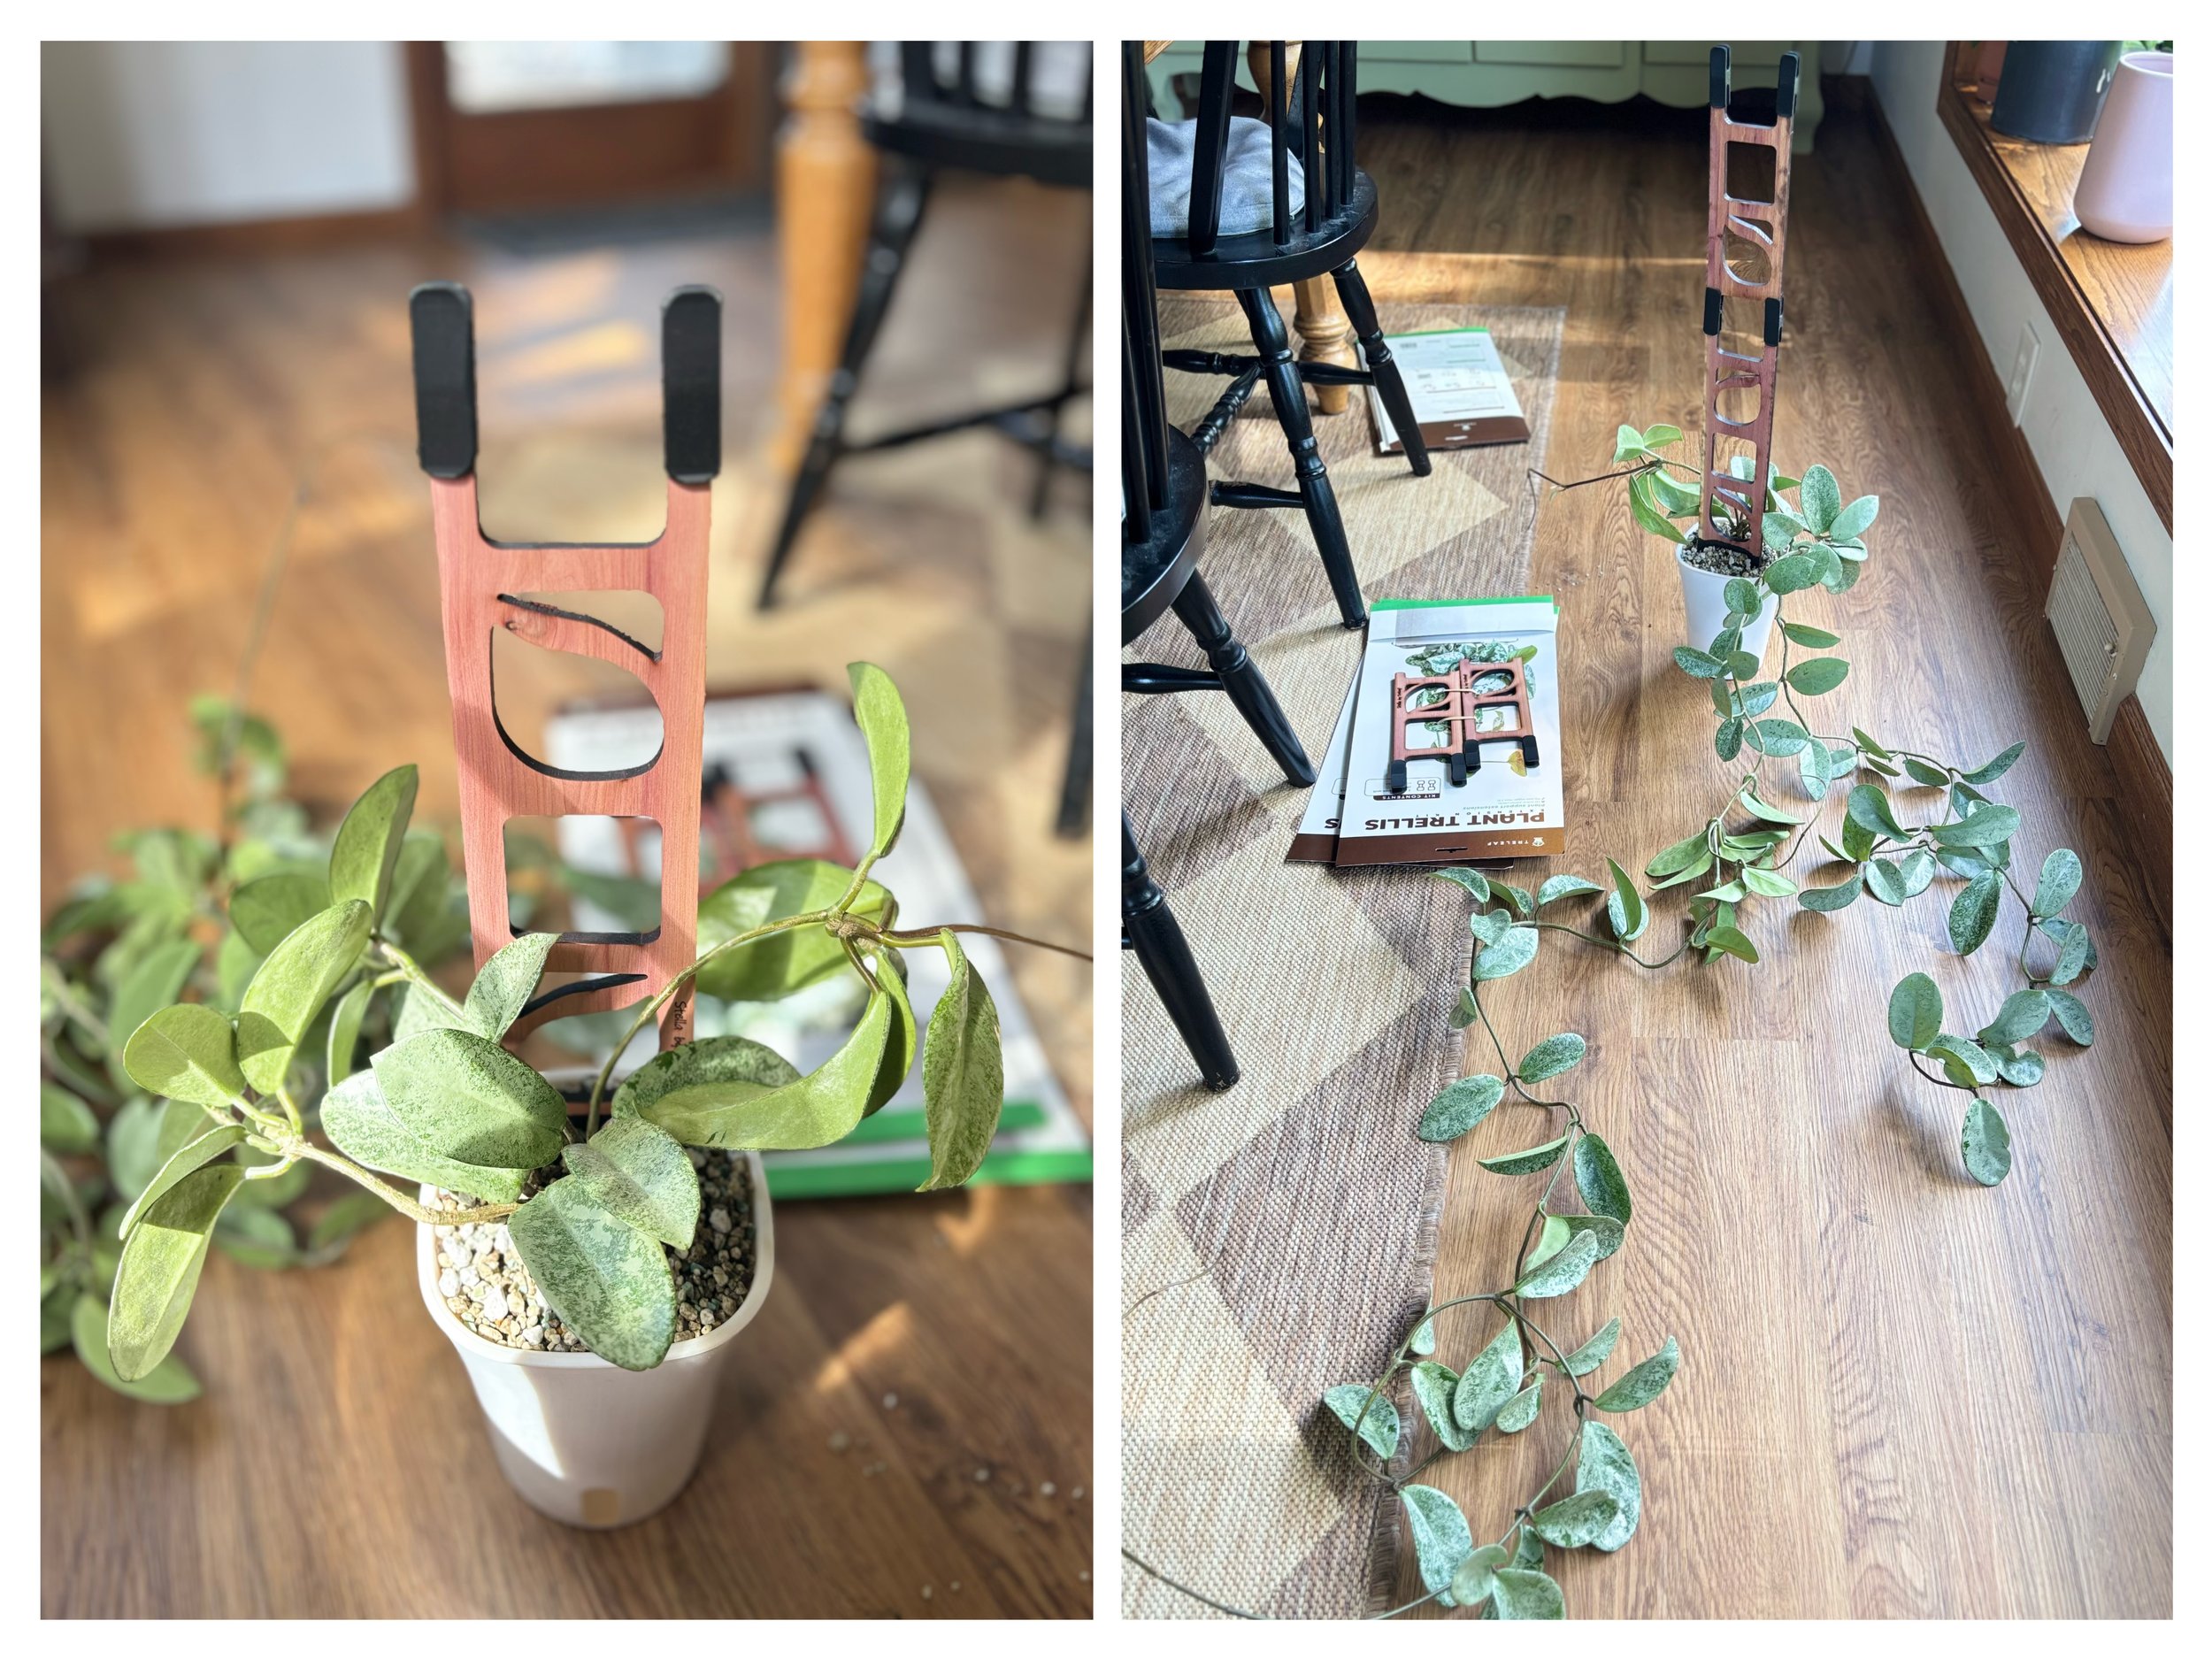
From personal experiences, it is always much easier to trellis a Hoya during repotting time, especially if you are a pon grower like me. Attempting to stick a trellis into a root-bound Hoya is just not a fun time (yet I still do trellis this way a lot of the times) and it maximizes the risks of disrupting the root system. Here, I am about to trellis my mature Nova Ghost after repotting it from a 4in self-watering pot to a 6in selfwatering pot, so I already know that I will need to use at least 2 extendables on top of the base support.
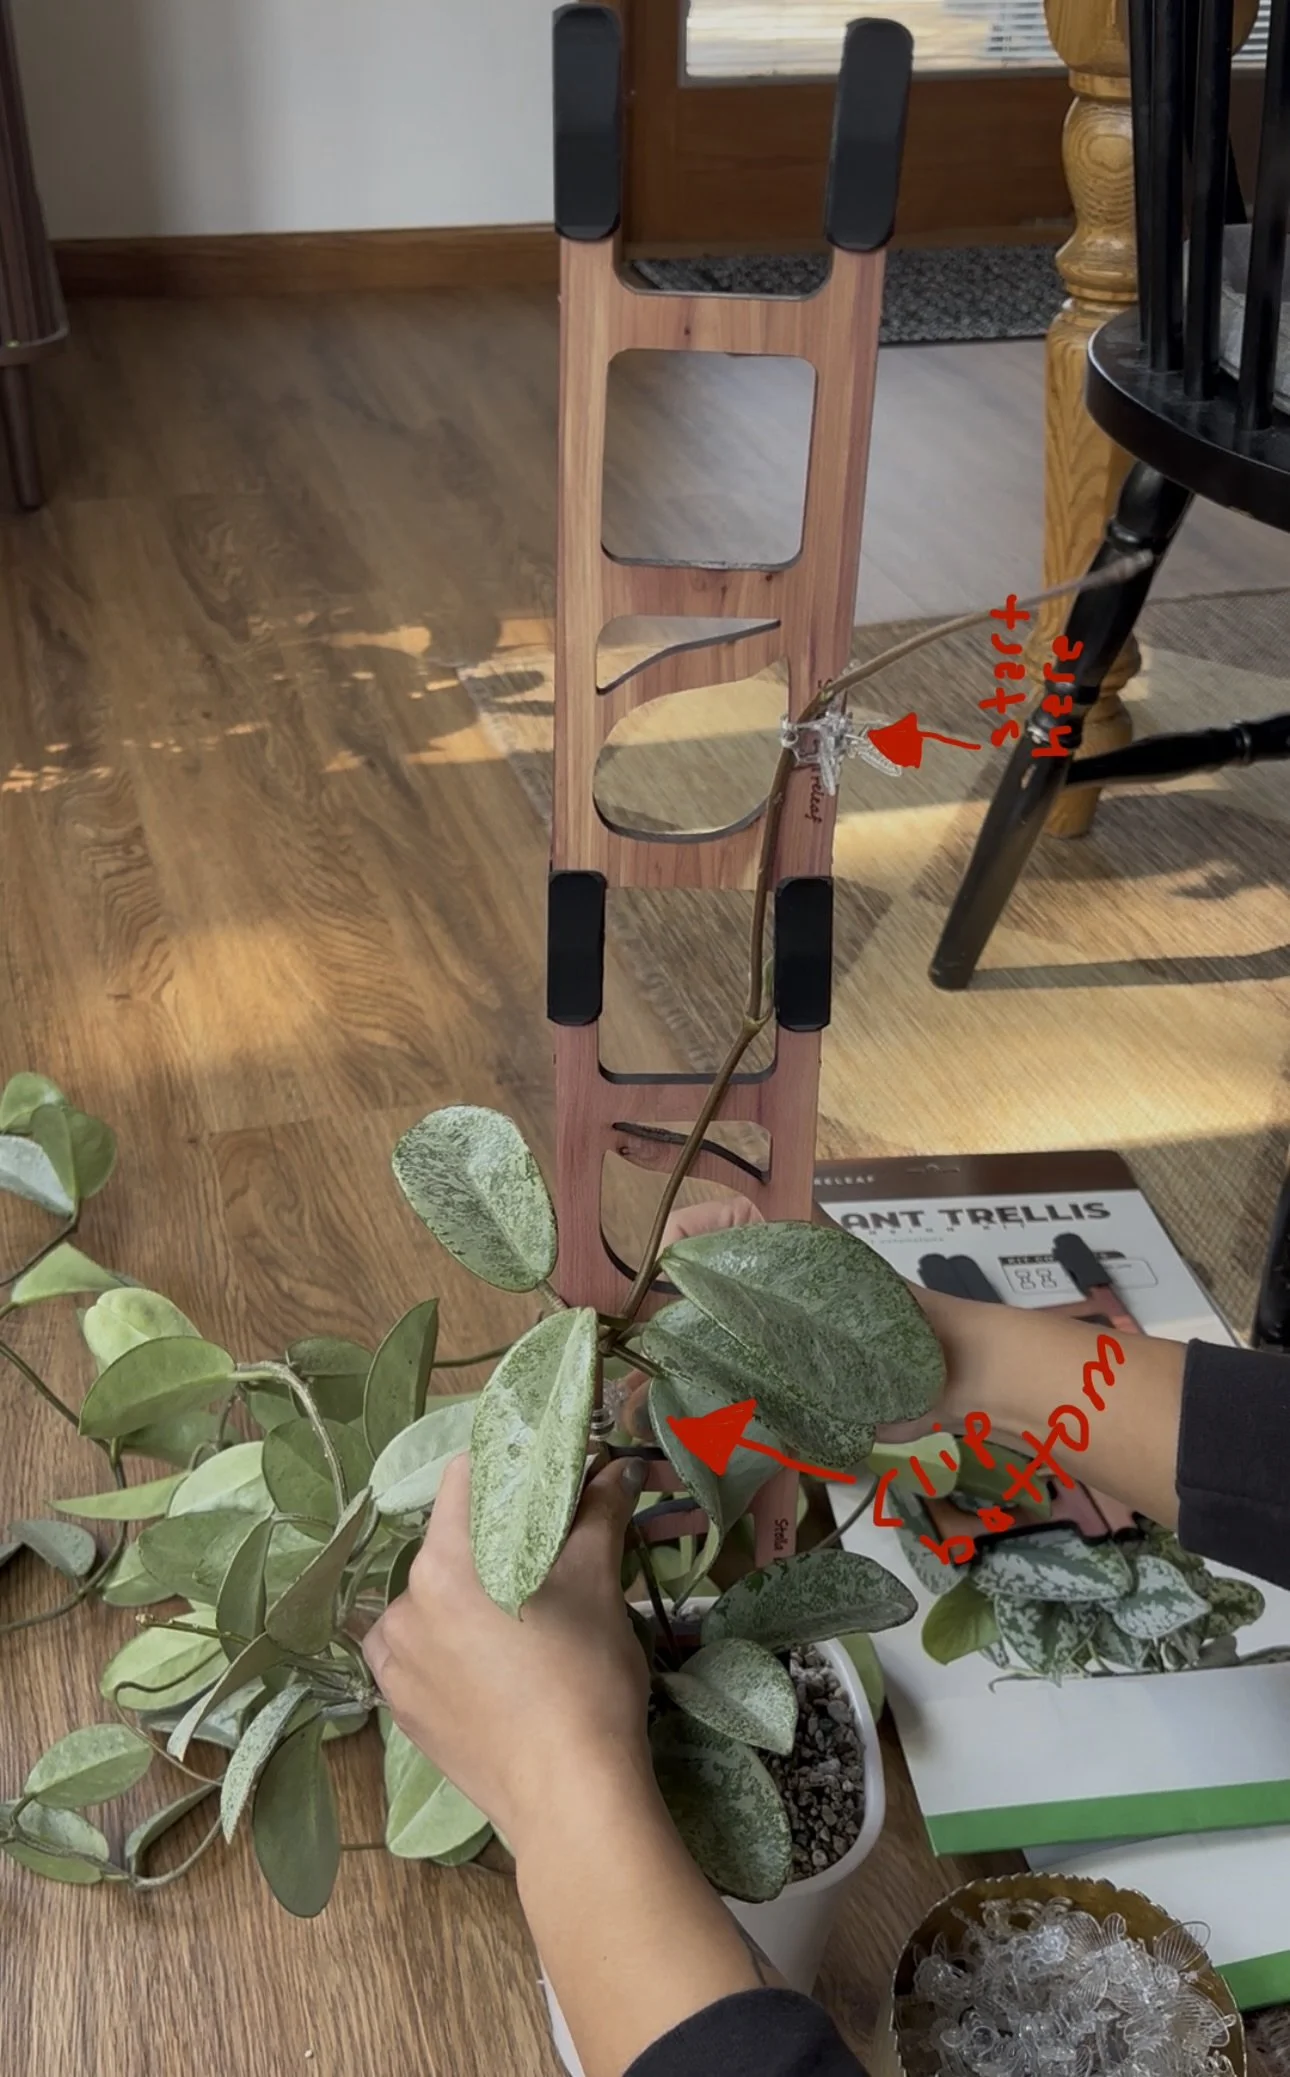
I always start with one strand at a time, letting the strand guide me on where it wants to grow. For newly established plants I usually start from the bottom up, clipping it down from the base first as I wait for new vines to lengthen and hardened off just enough where I won’t compromise the structure of the stem. However, this Nova Ghost is a pretty mature plant with a lot of leaves and strong stems to work with, so I like to clip from the top first to get a better idea of the general layout the strand wants to lay on the trellis, and then going back down towards the base and clipping down where it needs support, pinning down offshoots of the main branch I am trellising, and working out how I want the leaves to be displayed. Another cool part about this Treleaf Stella trellis is the ladder design that helped me rest the long and heavy strand on the top part of the trellis while I play around with the design without me having to hold it or committing to clipping it at the top first.
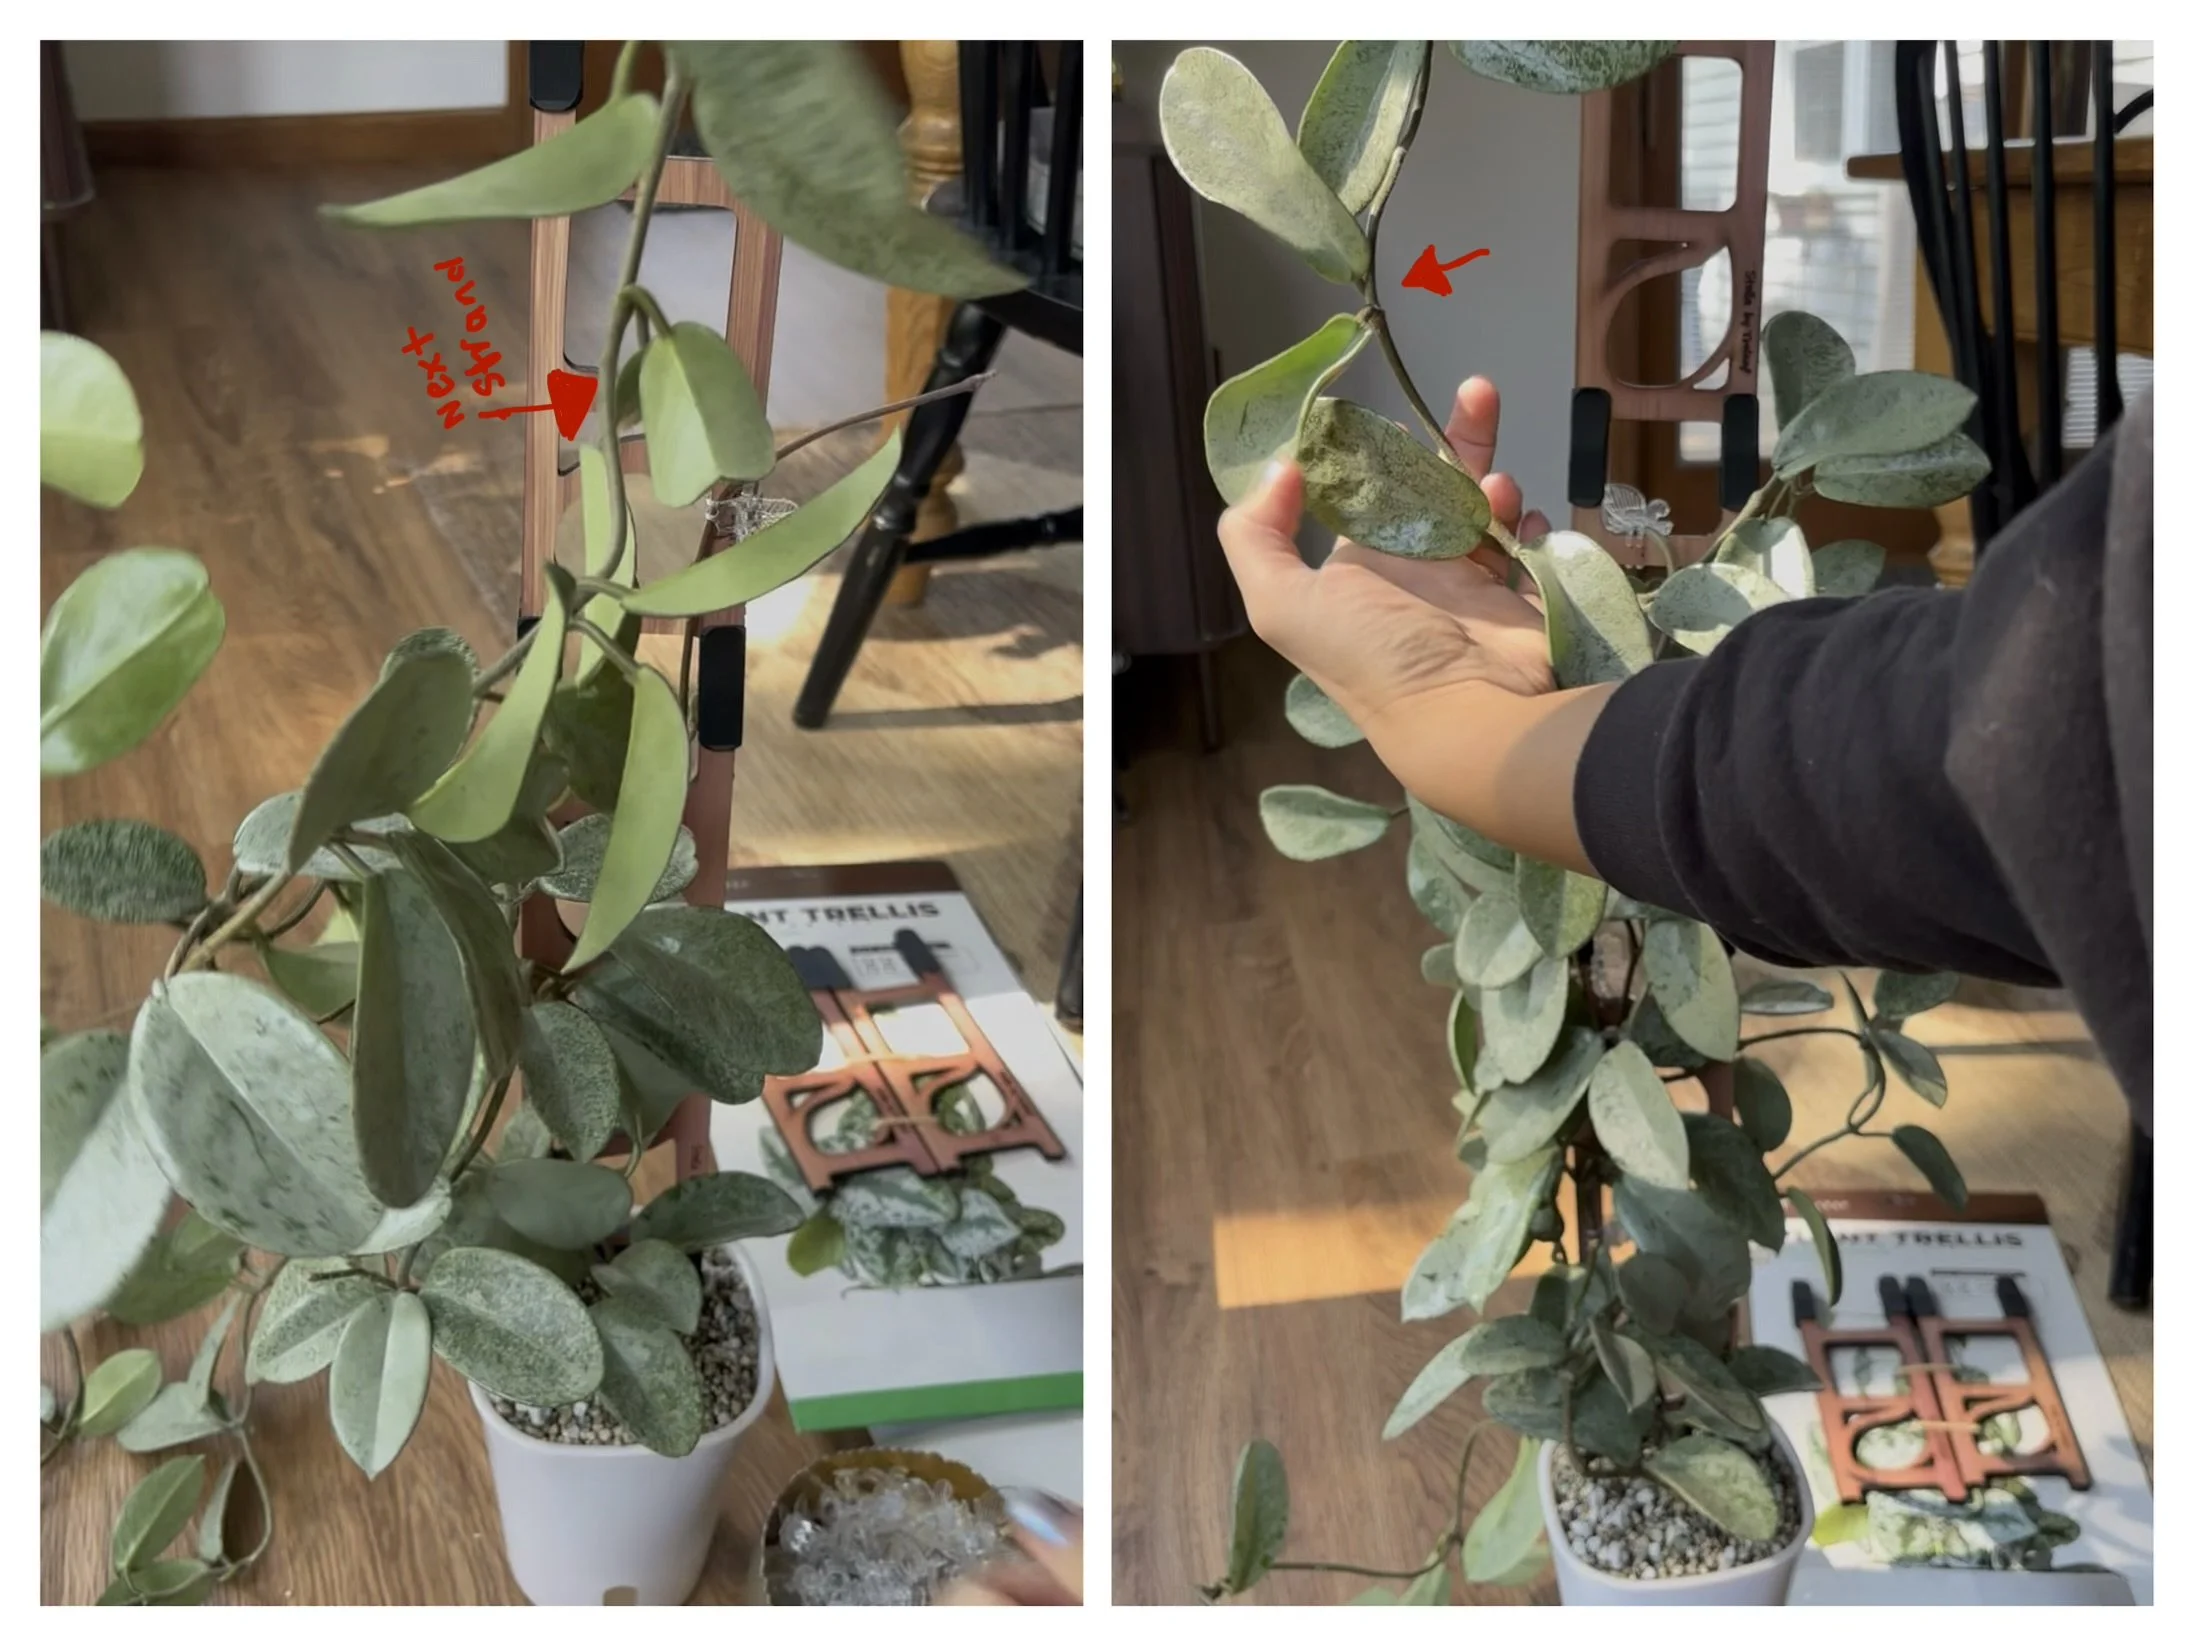
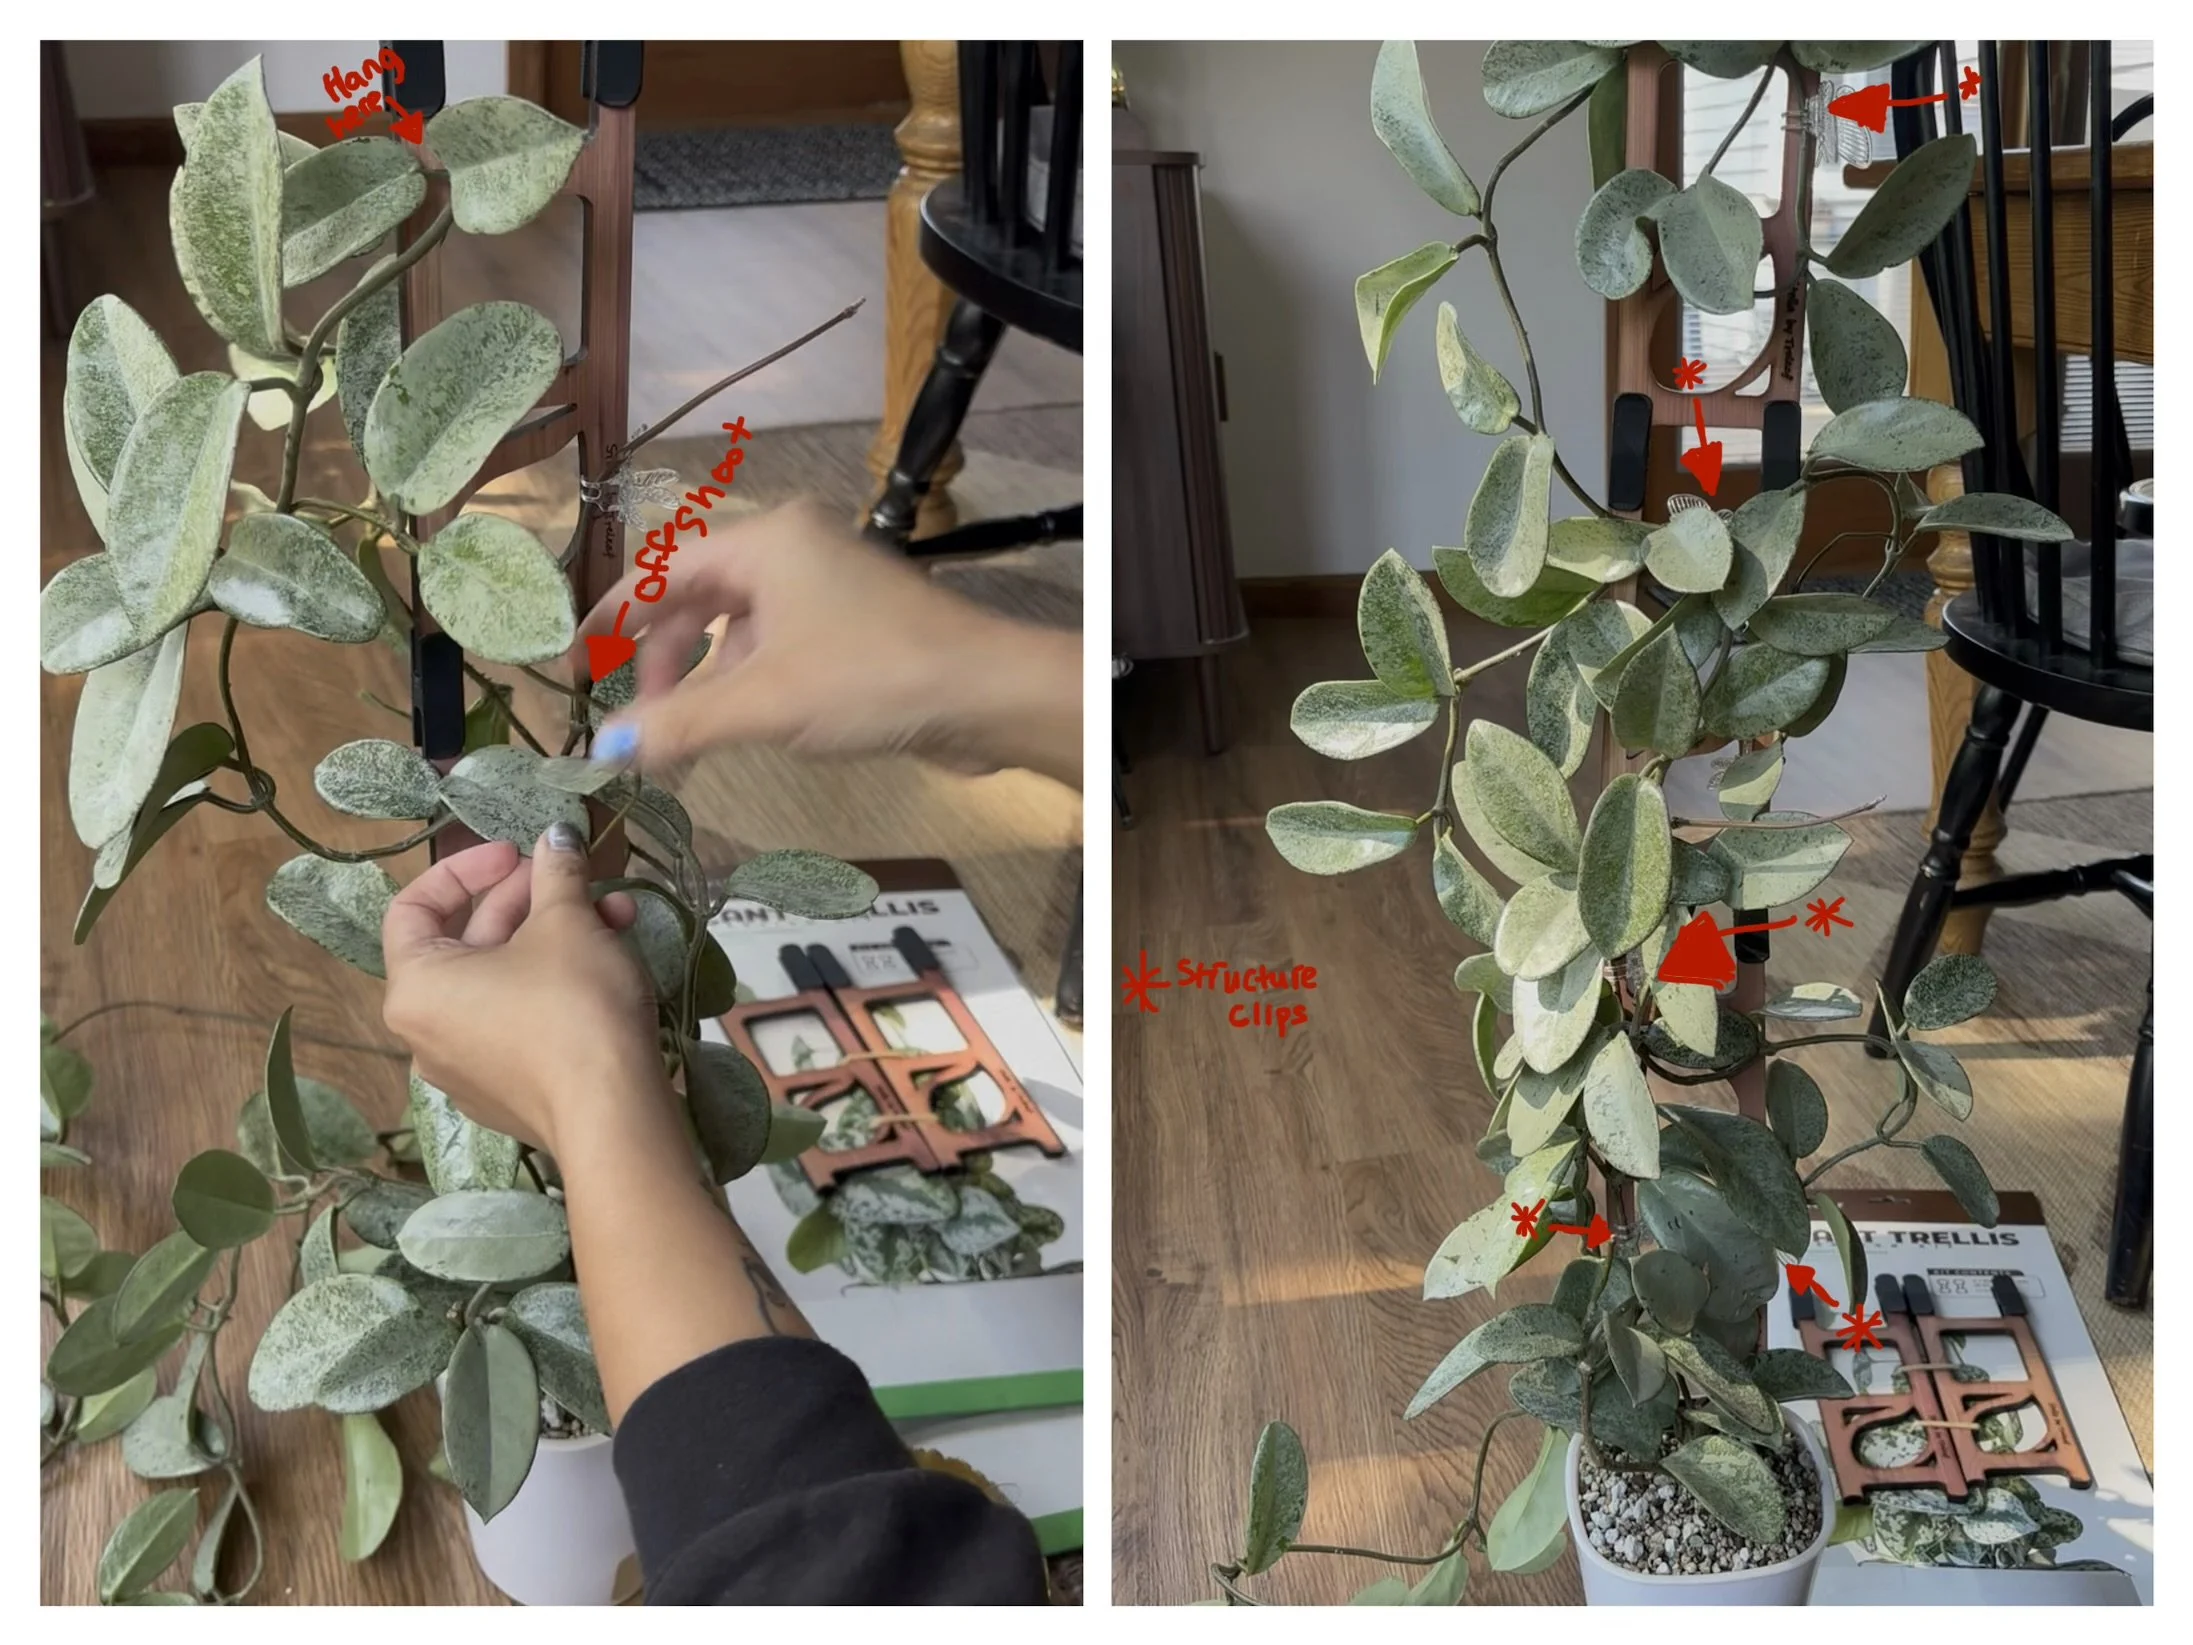
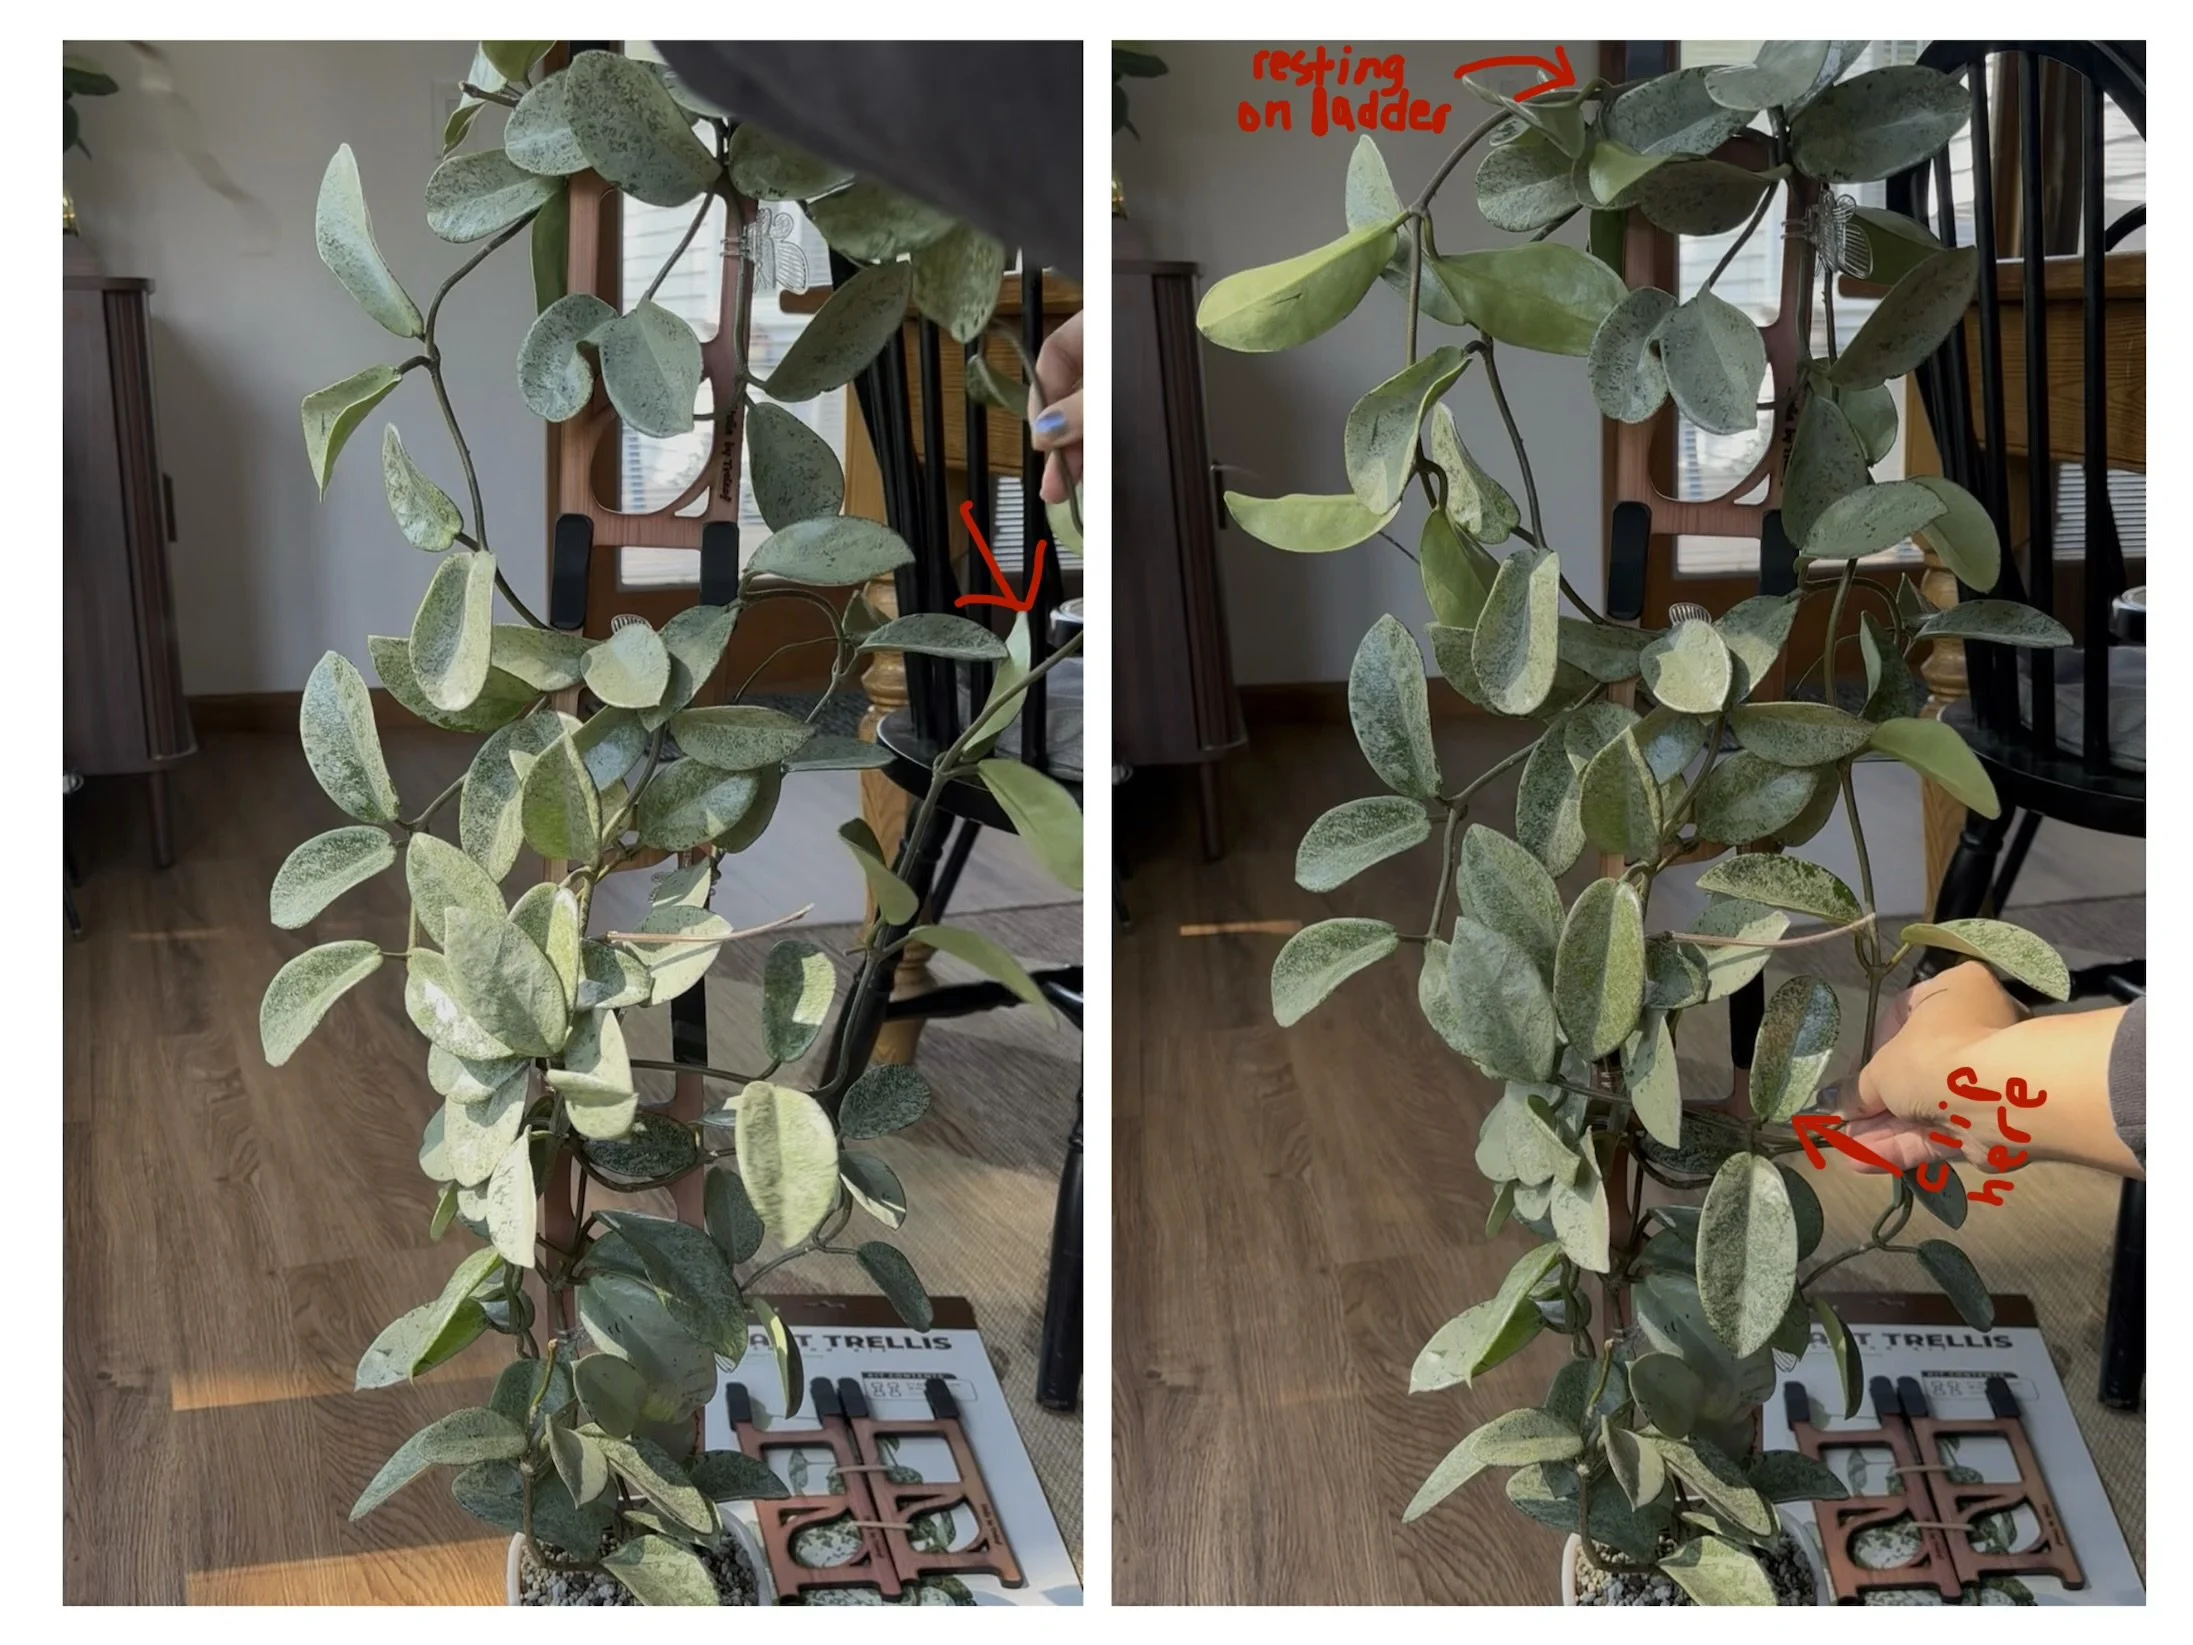
I think one of the most important advices I can give when it comes to trellising is to let your Hoya speak to you, see where the strands and leaves naturally want to lay and go from there. I cannot tell you how many times I have accidentally broken leaves and new baby stems from trying to force them to go a certain way. Compromising between the aesthetics you are aiming for and the growth pattern of your Hoya is an art within itself in my opinion. After clipping in the main support of each stem/strand onto the trellis, going back in and detailing is what will make or break the look of your plant. Almost like an artist going back to their canvas to add the finishing touches that elevate the painting, like shadowing or highlighting to add depths and layers. What do I mean by little details? It’ll be easiest to show you as I explain!
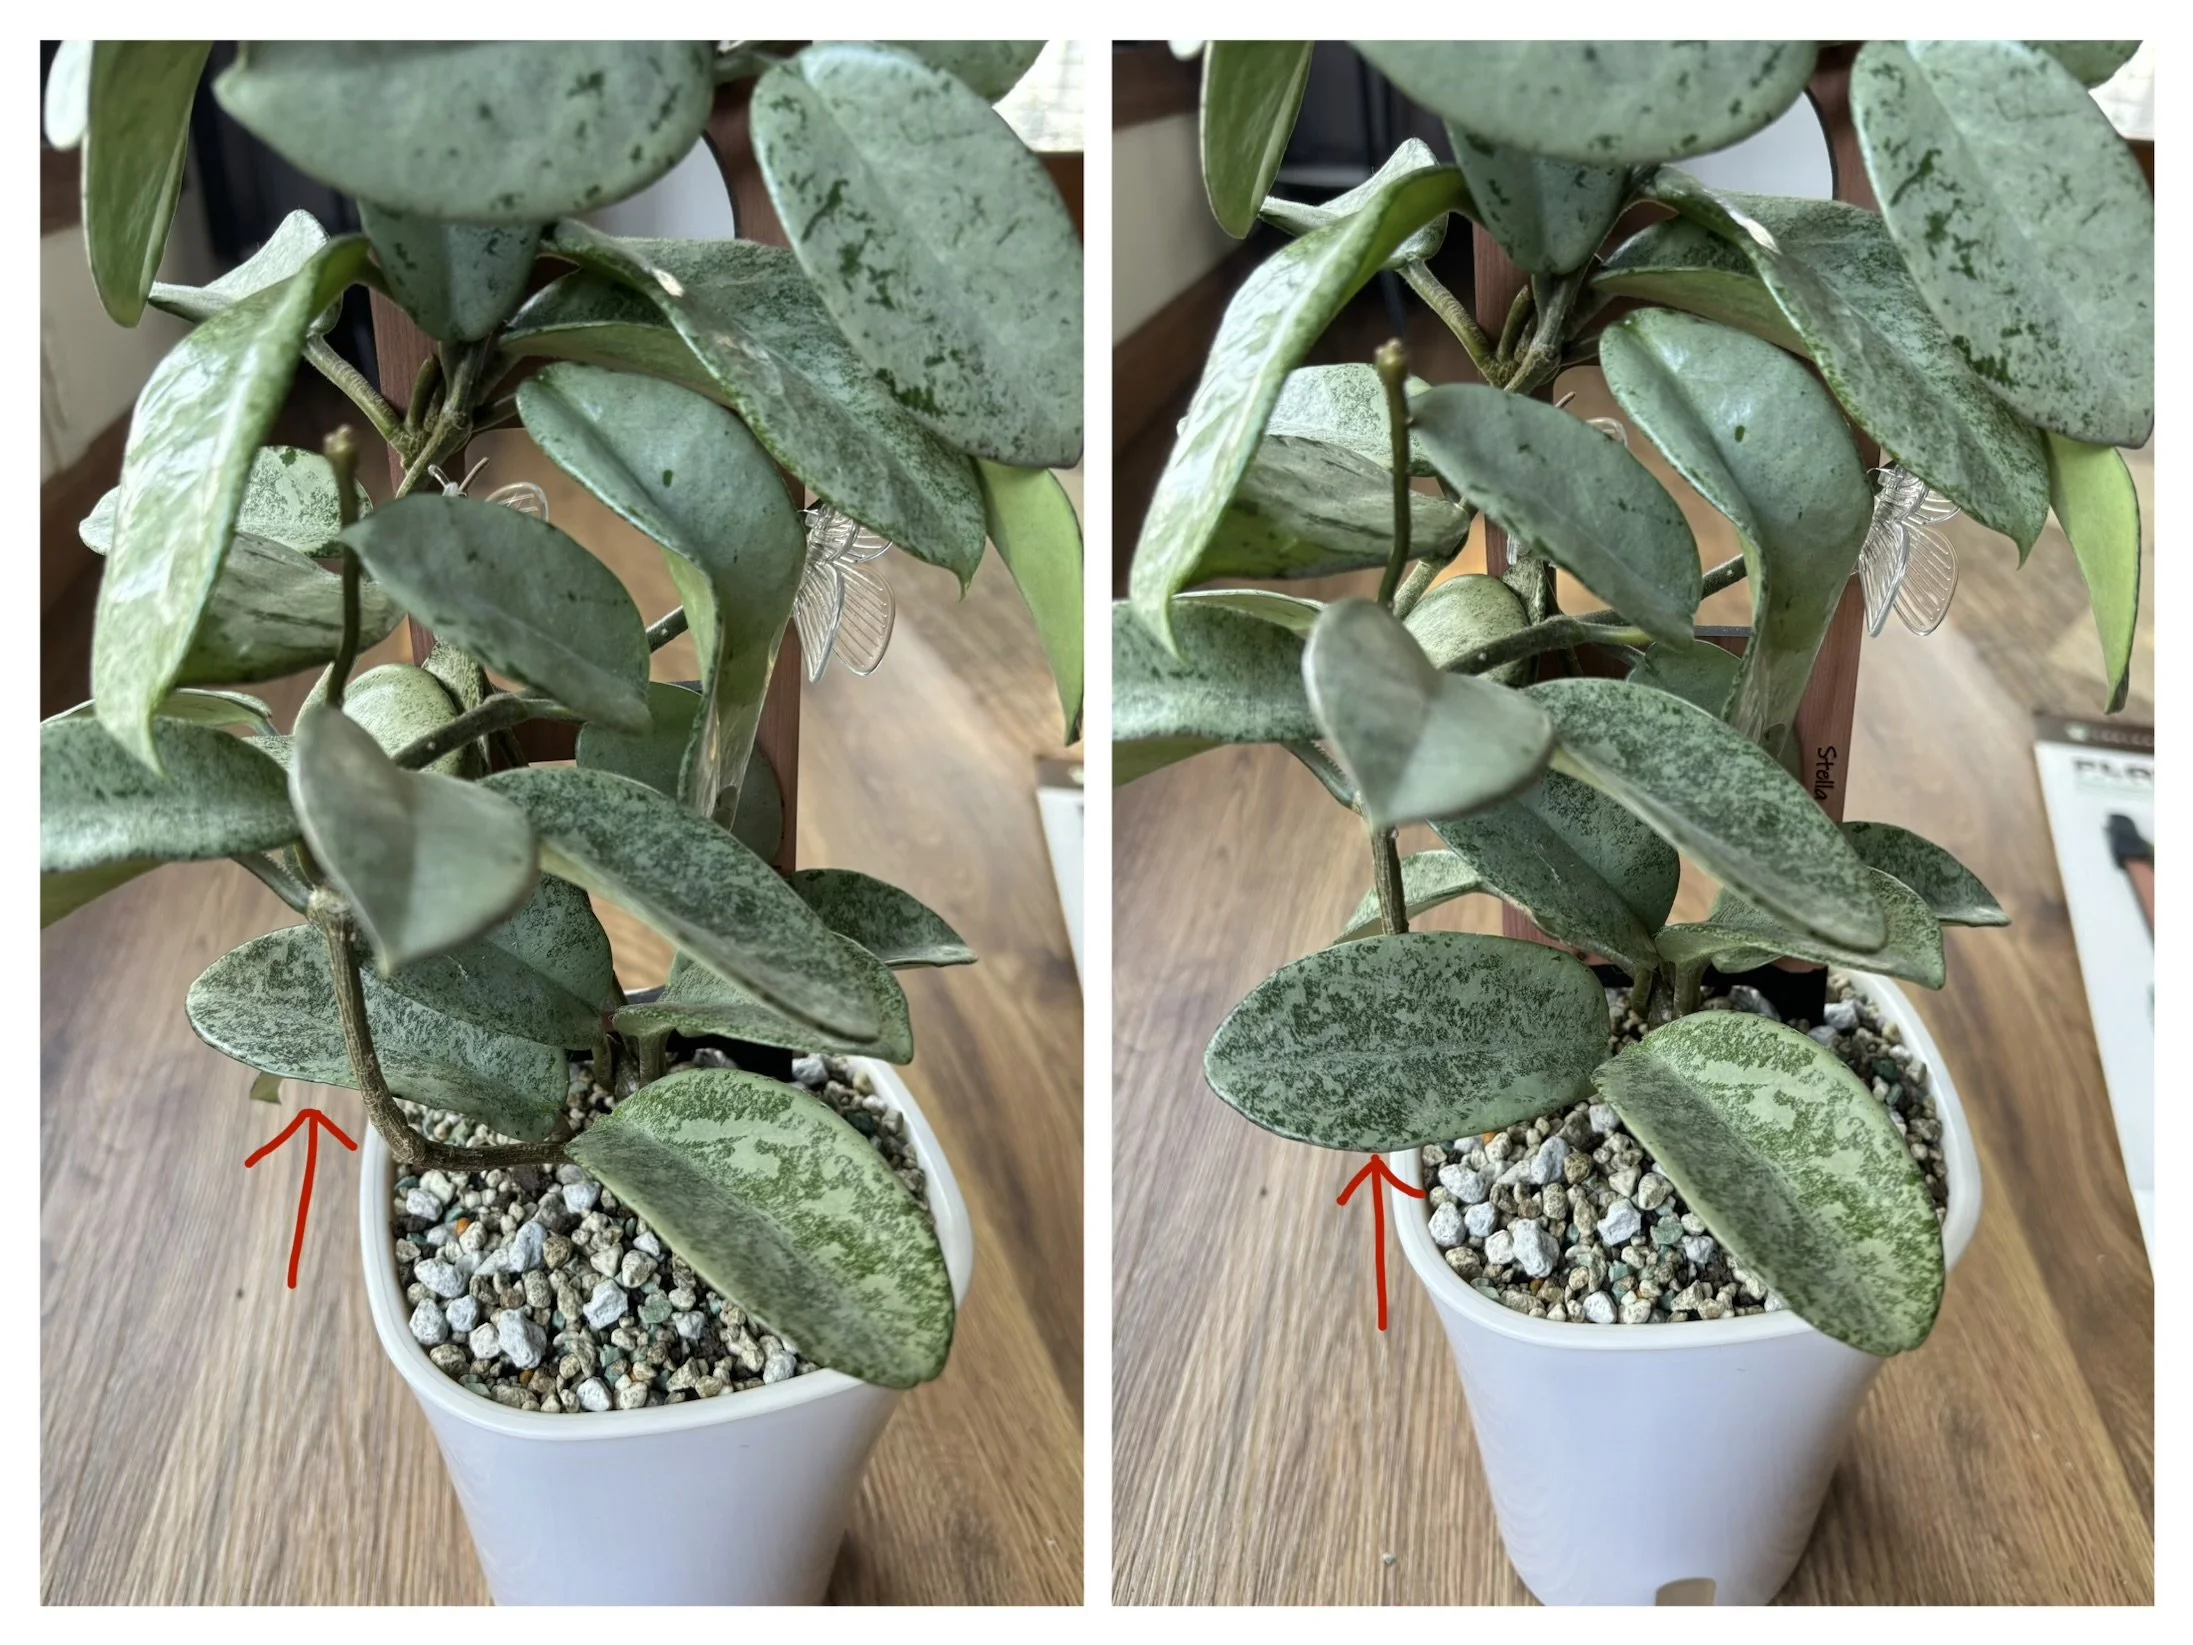
At first glance the left photo may seem completely fine as everything is secured and laying nicely on the trellis but you can see that a beautiful and juicy leaf is just hiding behind a stem, and just by moving the leaf to be in front of that stem, not only do you hide that bare vine but it also put that cute little foliage on full display. Overall it just makes the whole plant more attractive. The smallest details make such a huge impact and it is so fun for me to go back after anchoring down the plant to then essentially “design” the look of the plant that you are going for. Here are some more examples of little details I fixed on this Nova Ghost:
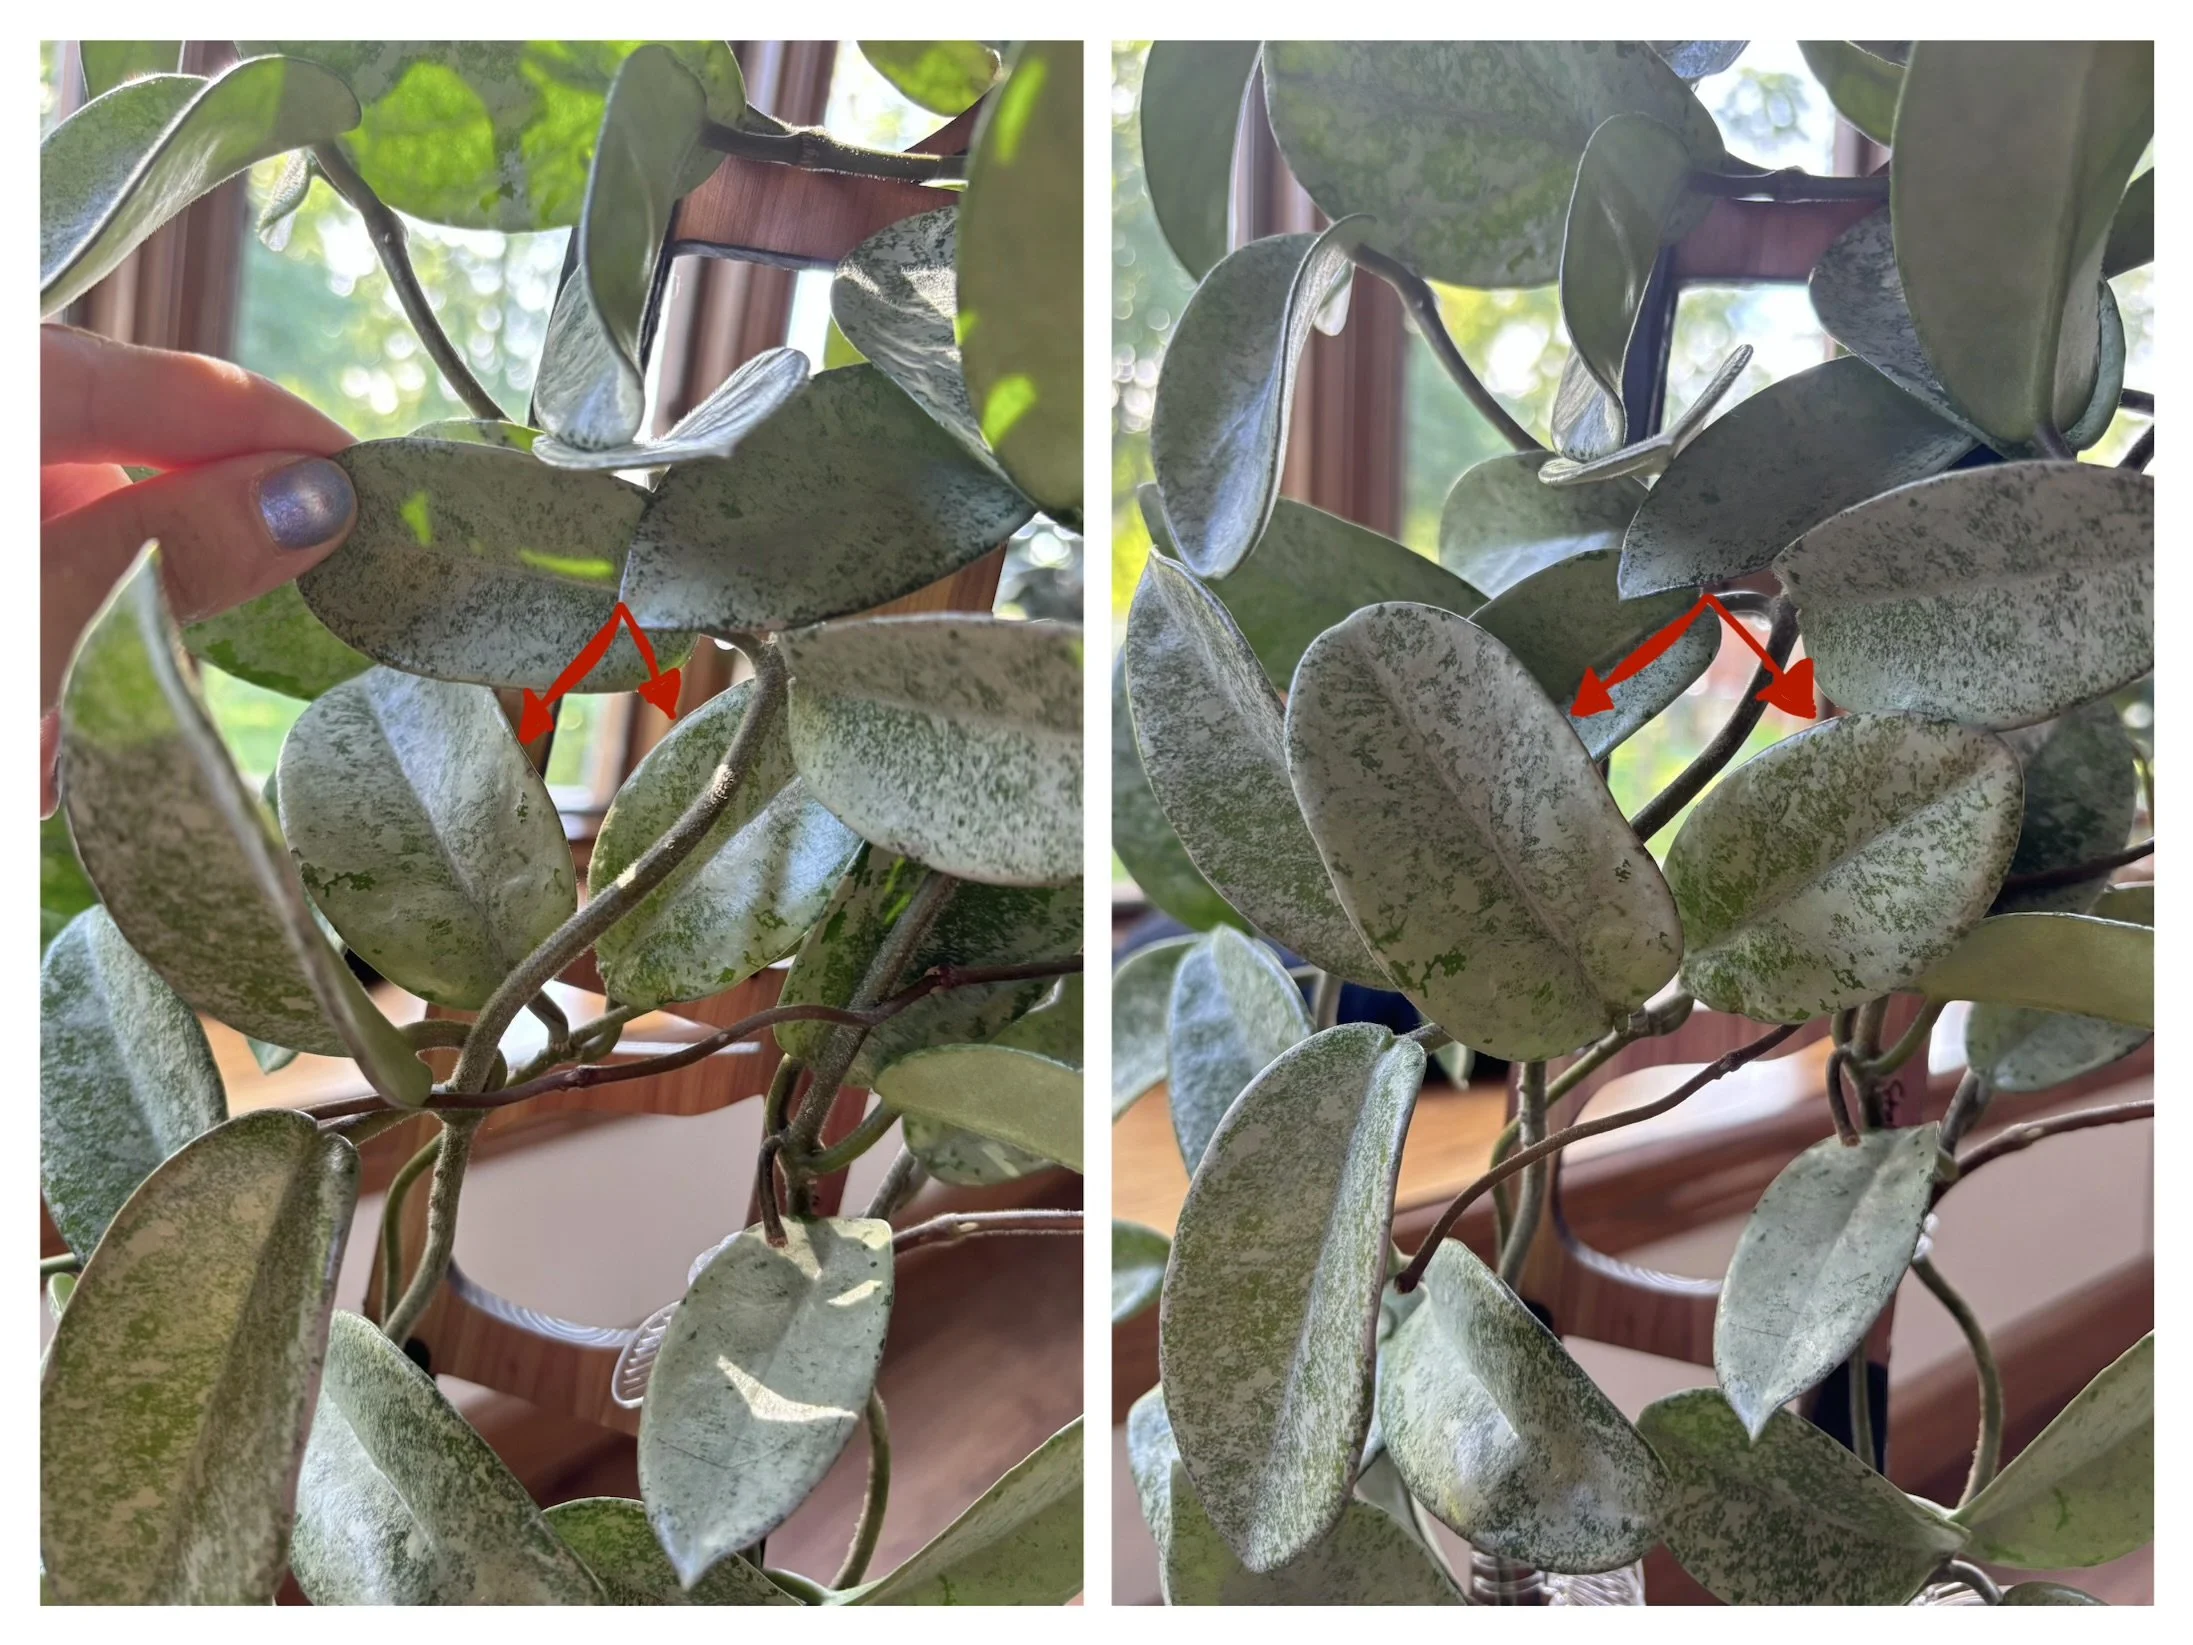
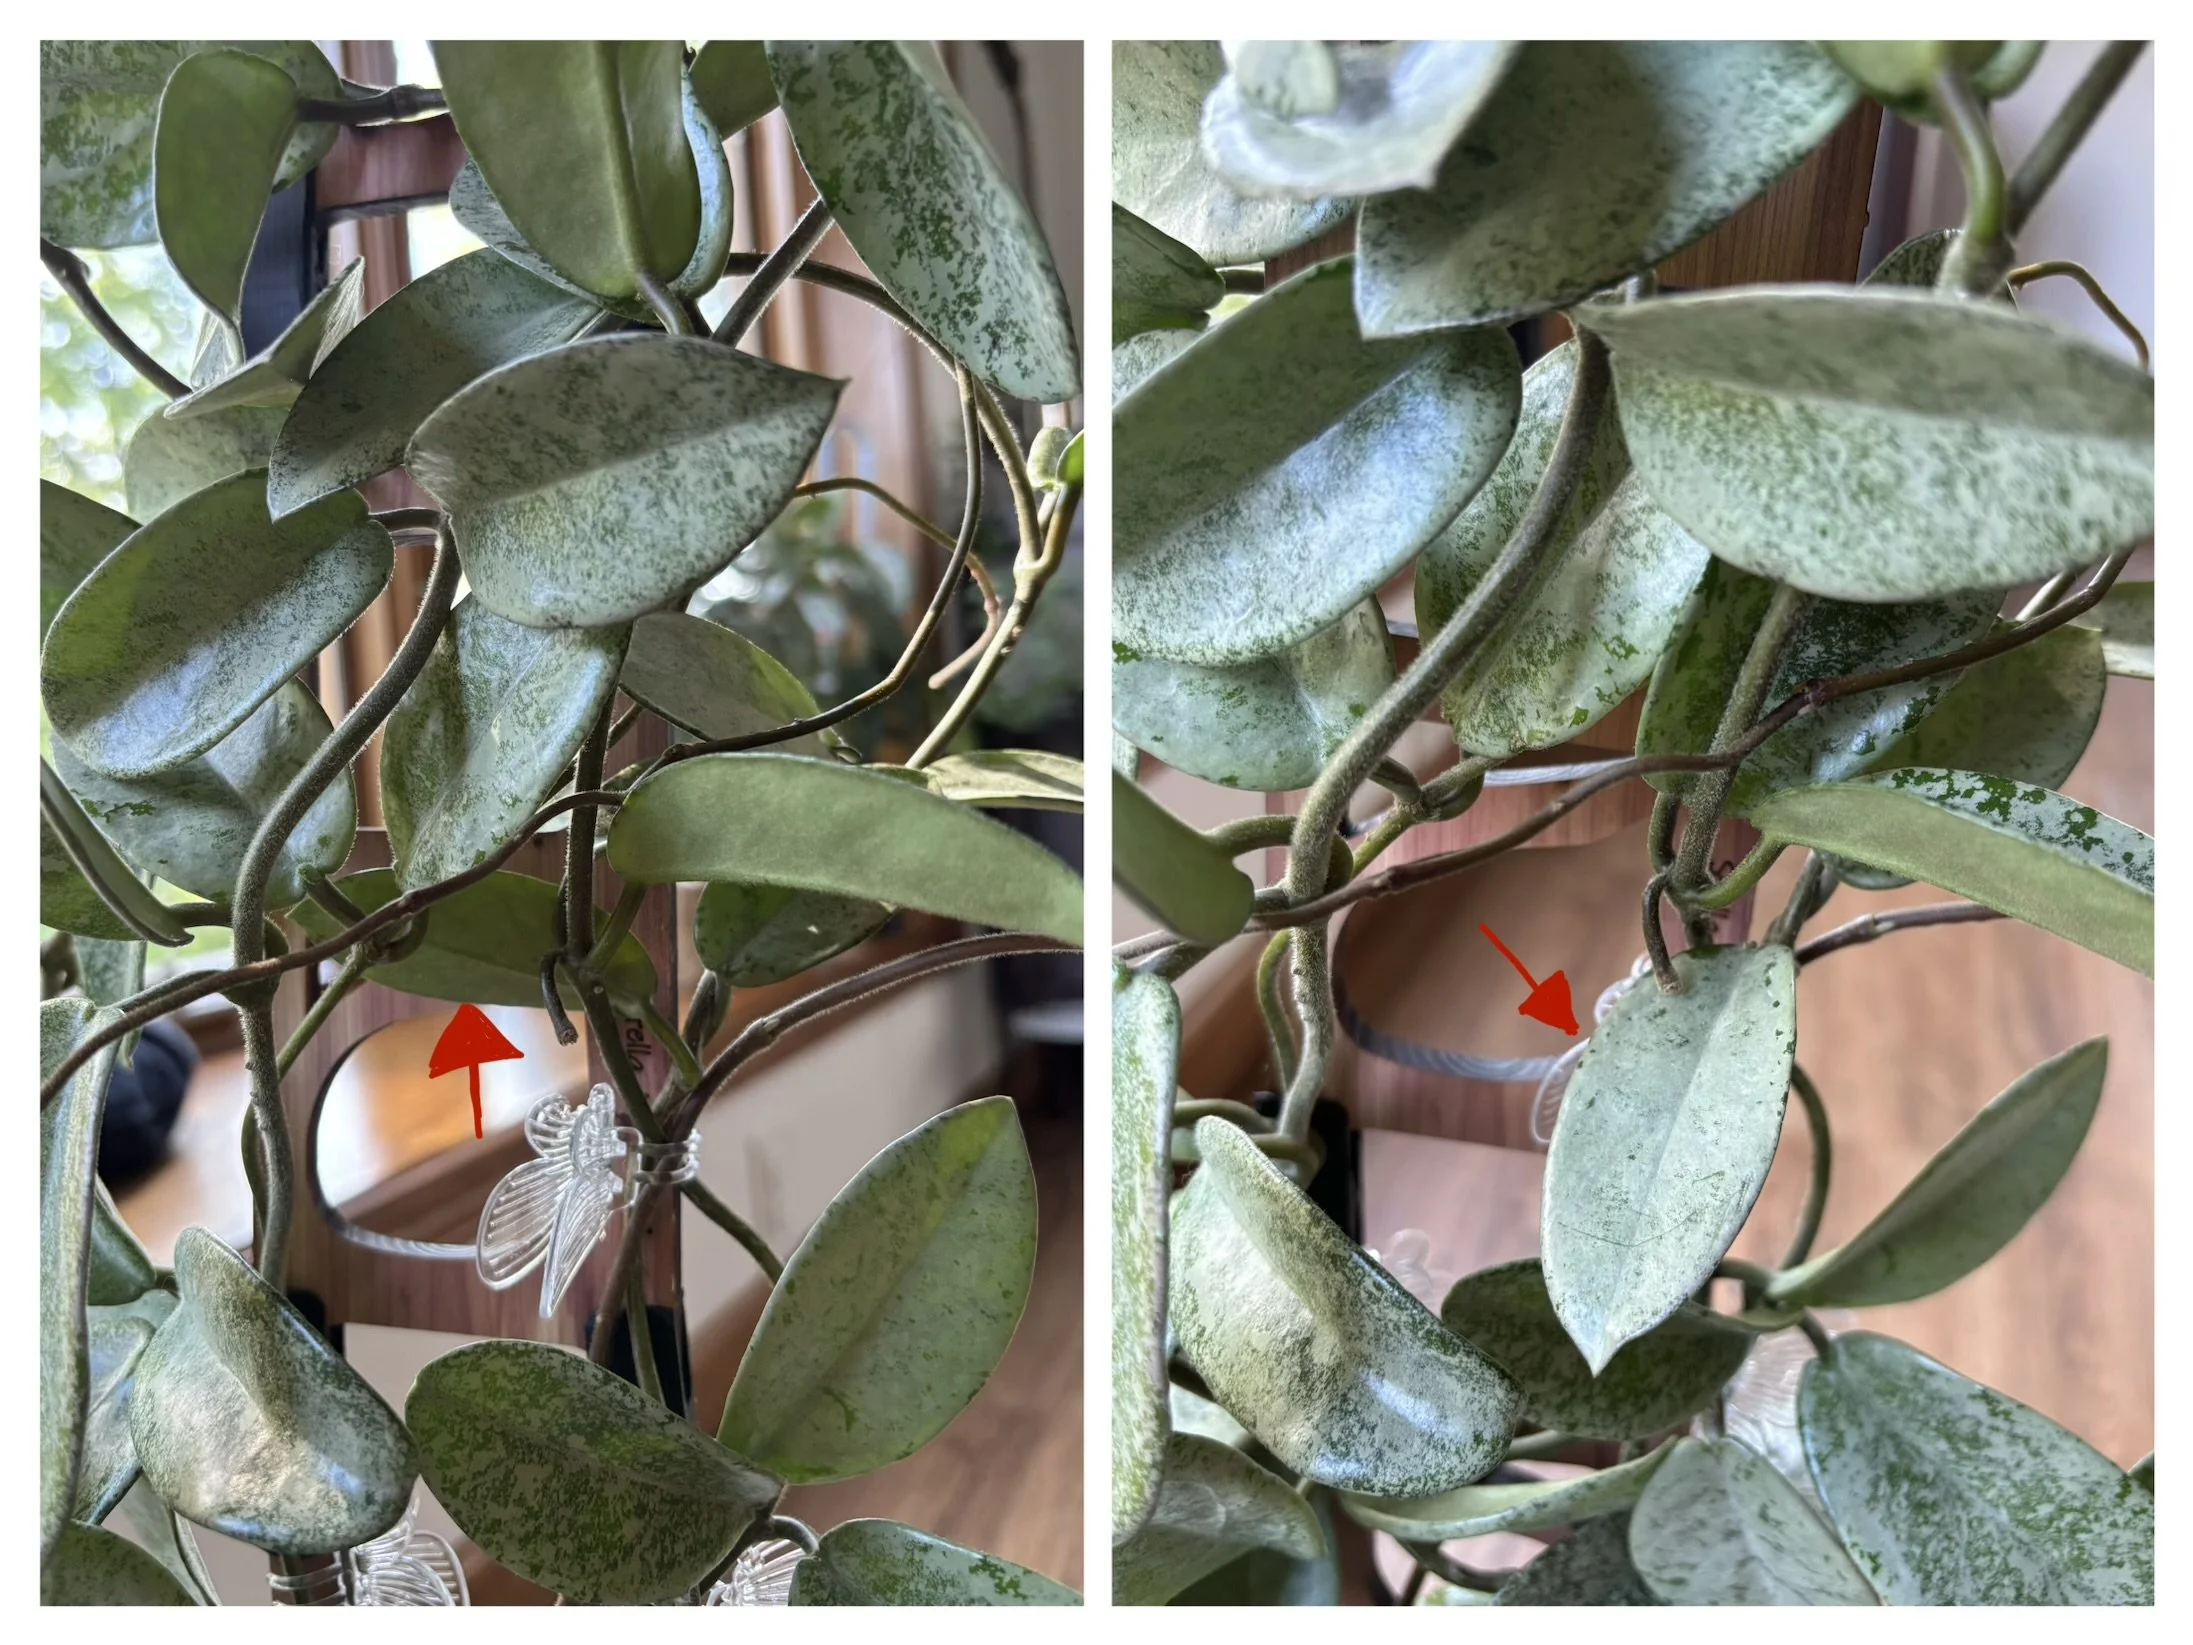
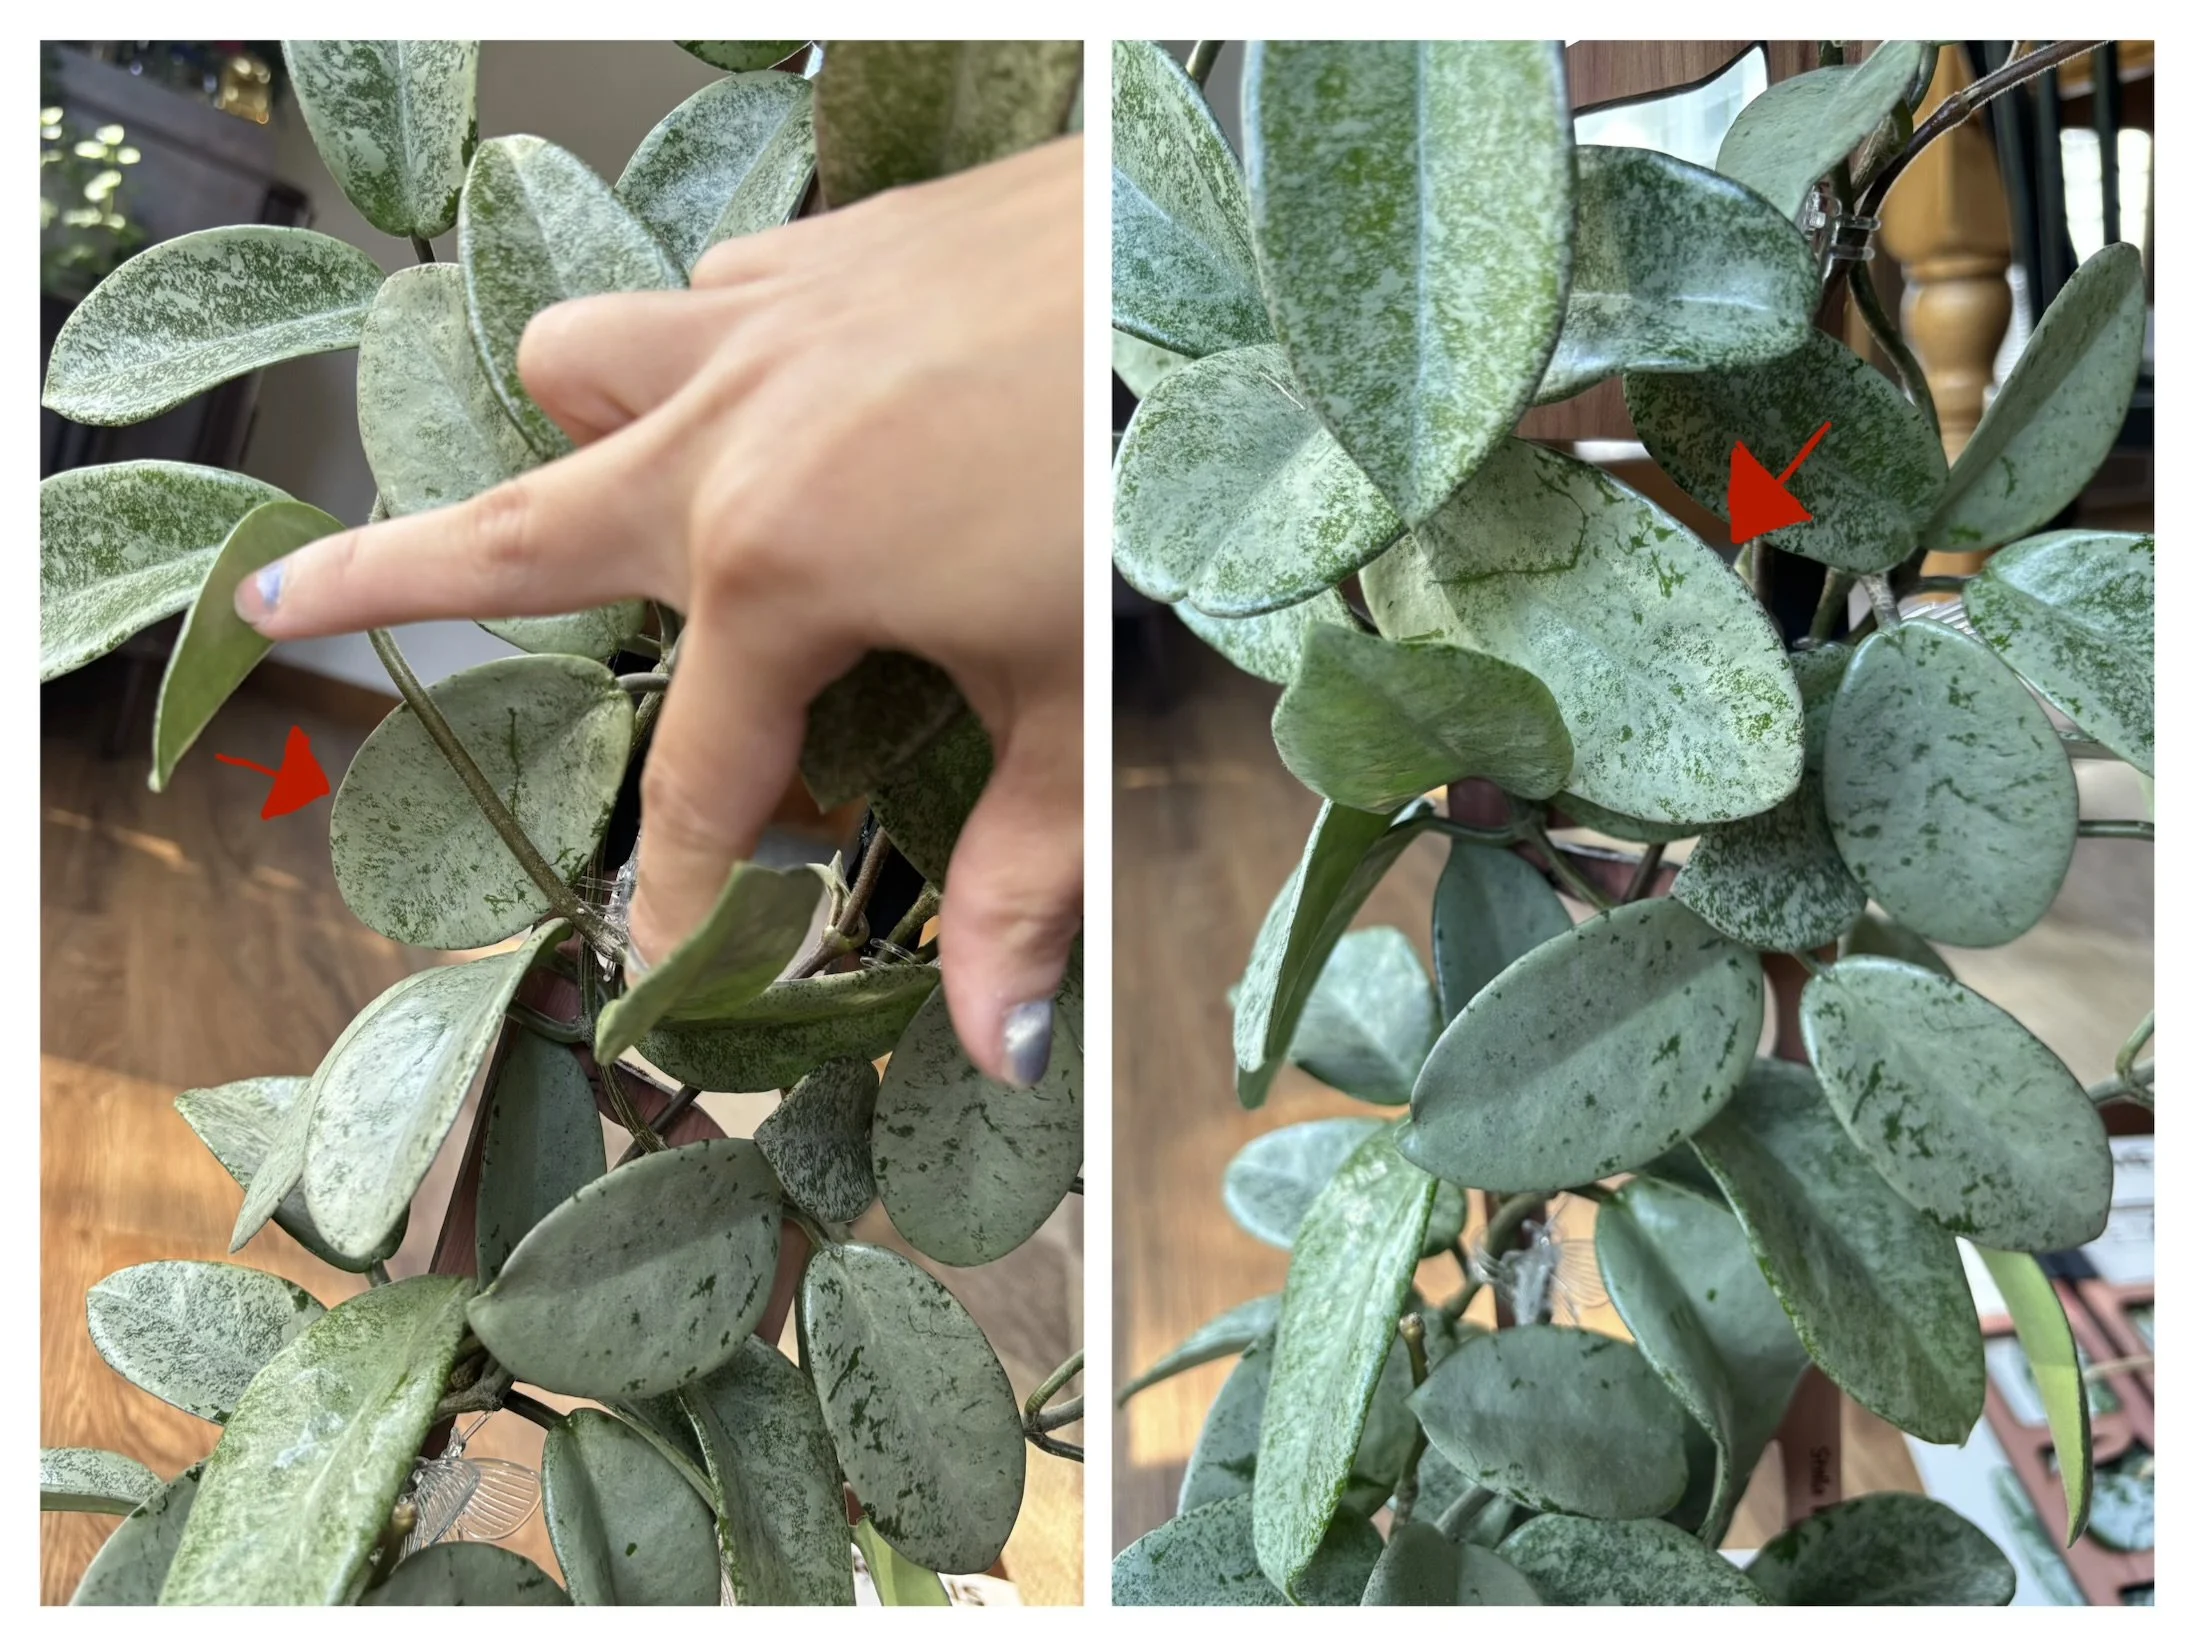
If I don’t point them out I bet it would be incredibly difficult to pinpoint exactly what are different but I feel like once you see it, you can just tell how different the plant looks. My two main goals are to one, get any leaves that would cooperate to face outwards, and two, hide and clip down any bare vines that are sticking out and taking attention away from the foliages themselves. Luckily, in this case, carnosas are incredibly forgiving when it comes to the vine and foliage bending around without breaking or bleeding, however there are some species that would be harder to trellis such as griffithiis, that one will literally bleed if you just look at it. Like I mentioned before, it honestly is seeing what your Hoya wants to do, how it wants to grow, and letting that guide you through the trellising process. Another tip I would give is to use clear clips for big and mature plants like this because you will end up using a lot and that helps them blend in with the plant.
Aesthetics aside, I highly recommend going back and making sure any active growth tips on the trellis is facing up, that will encourage the growth point to keep going instead of trying to push new growth elsewhere.
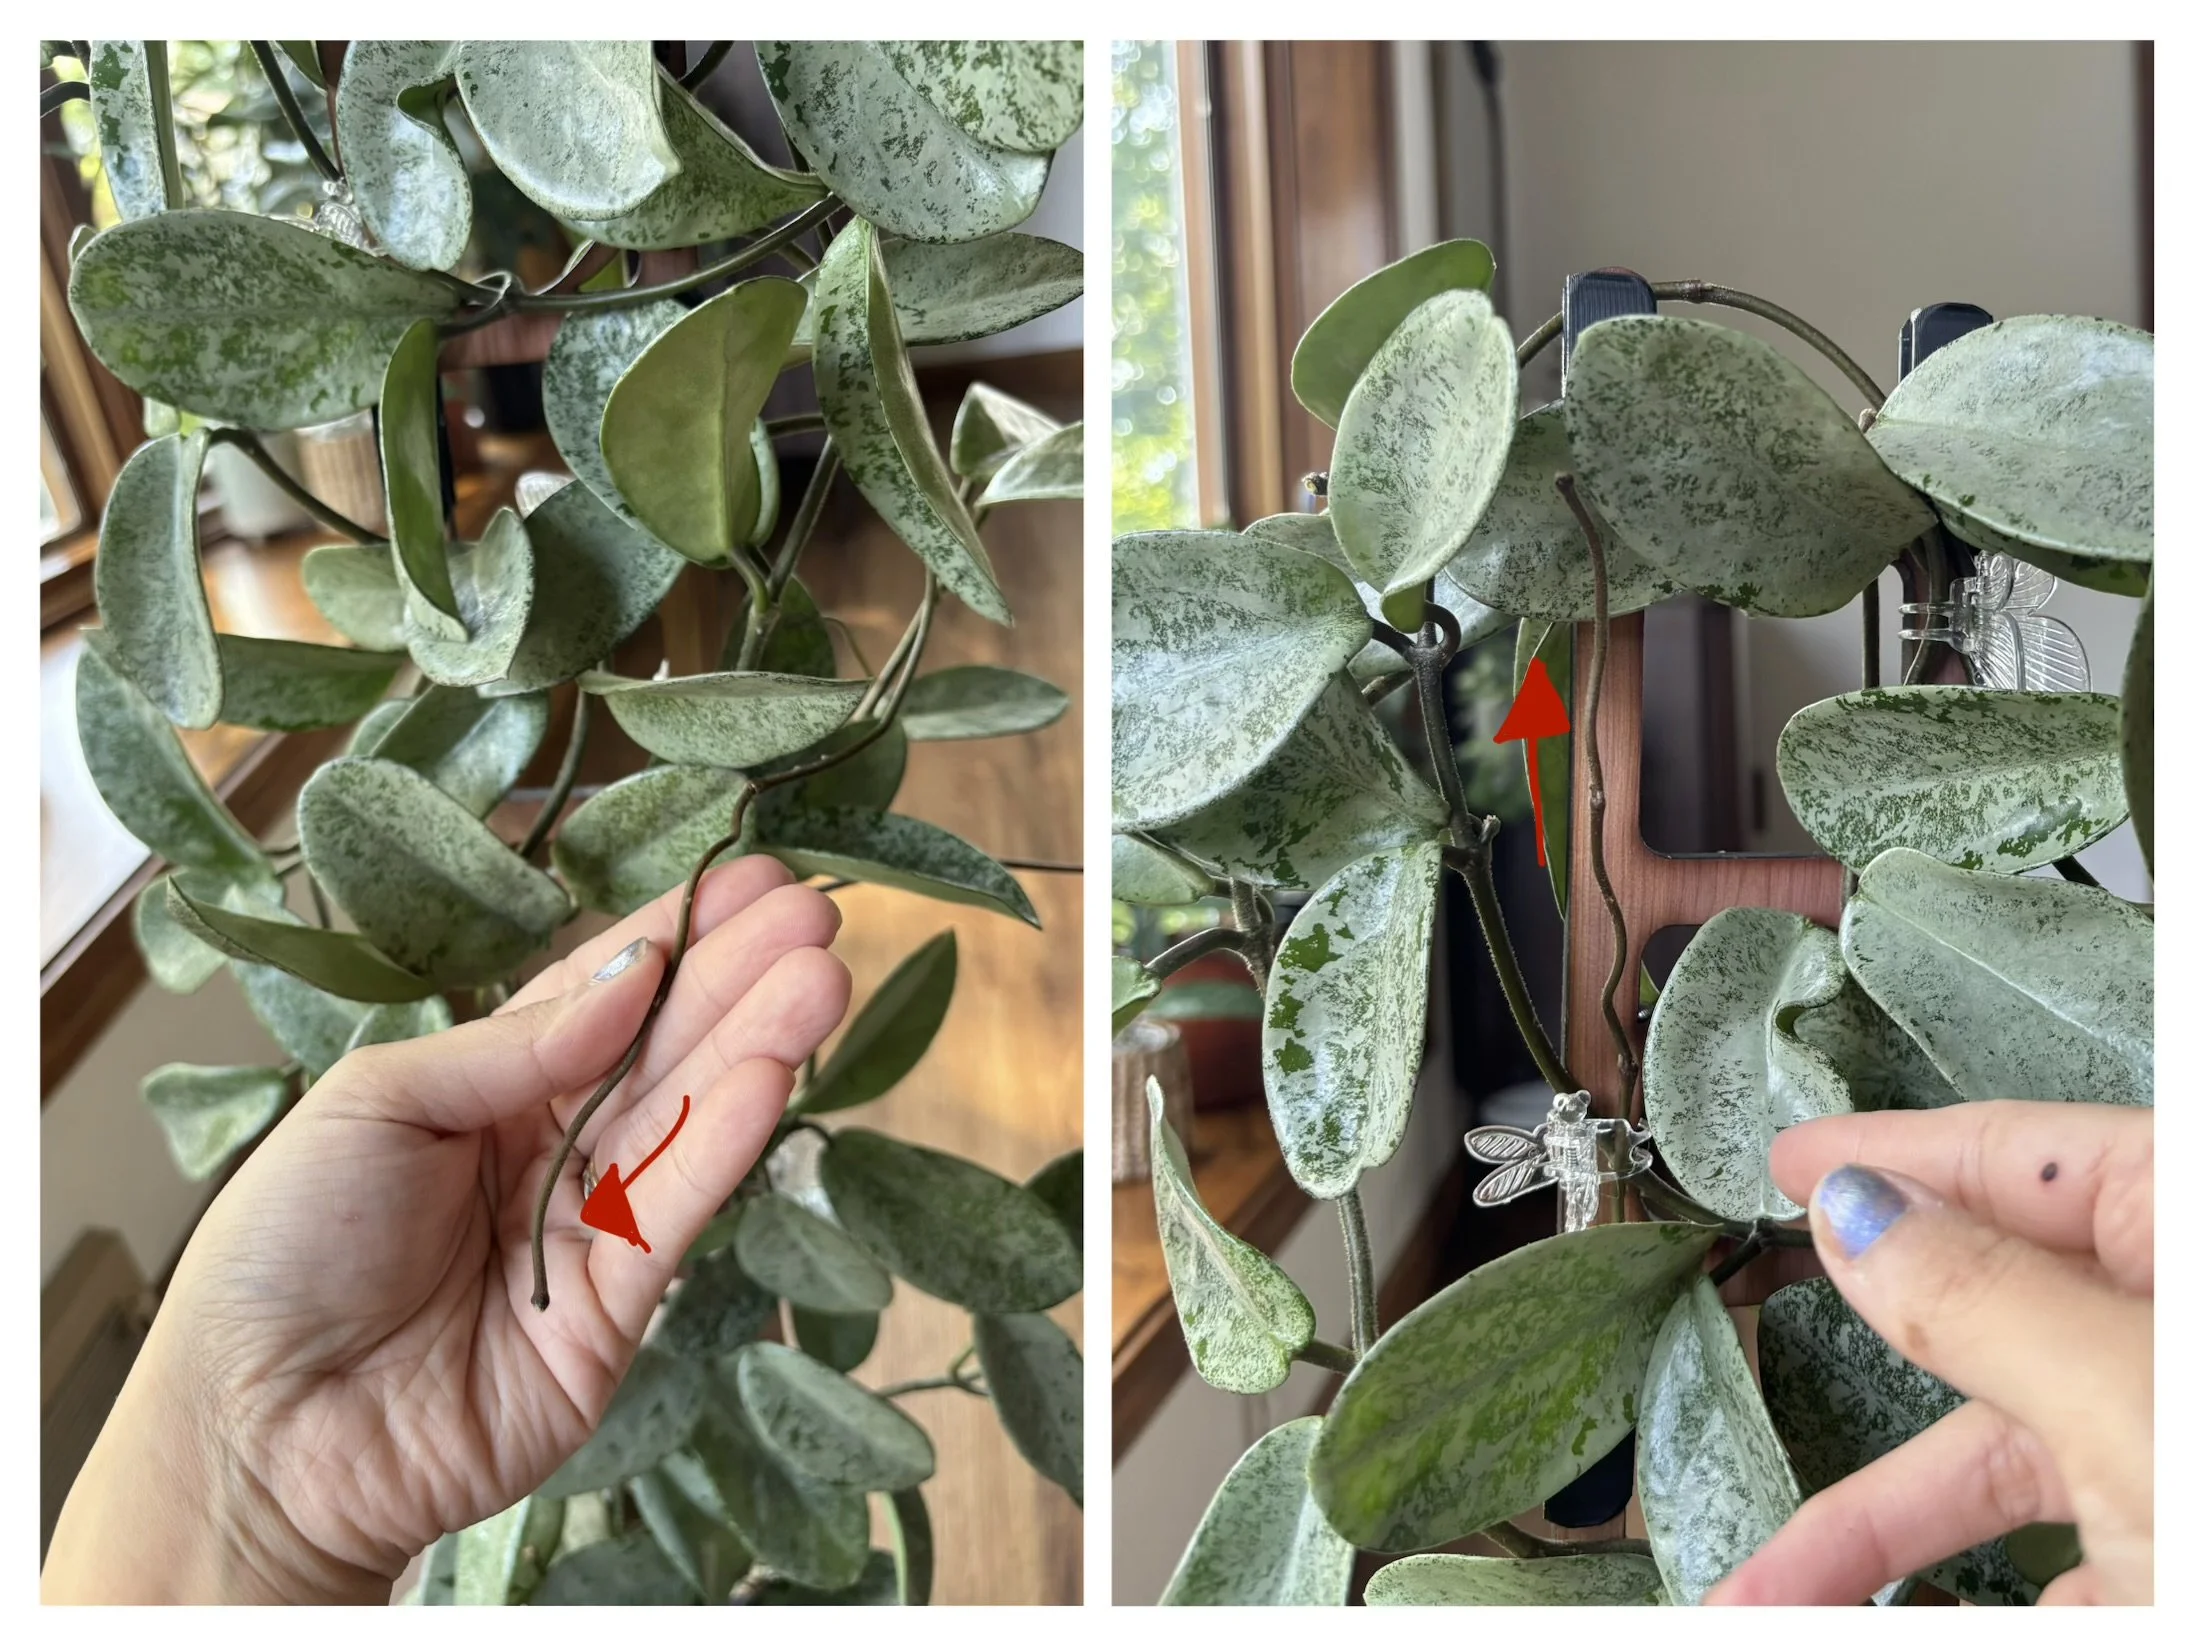
The end result should look a little something like this!
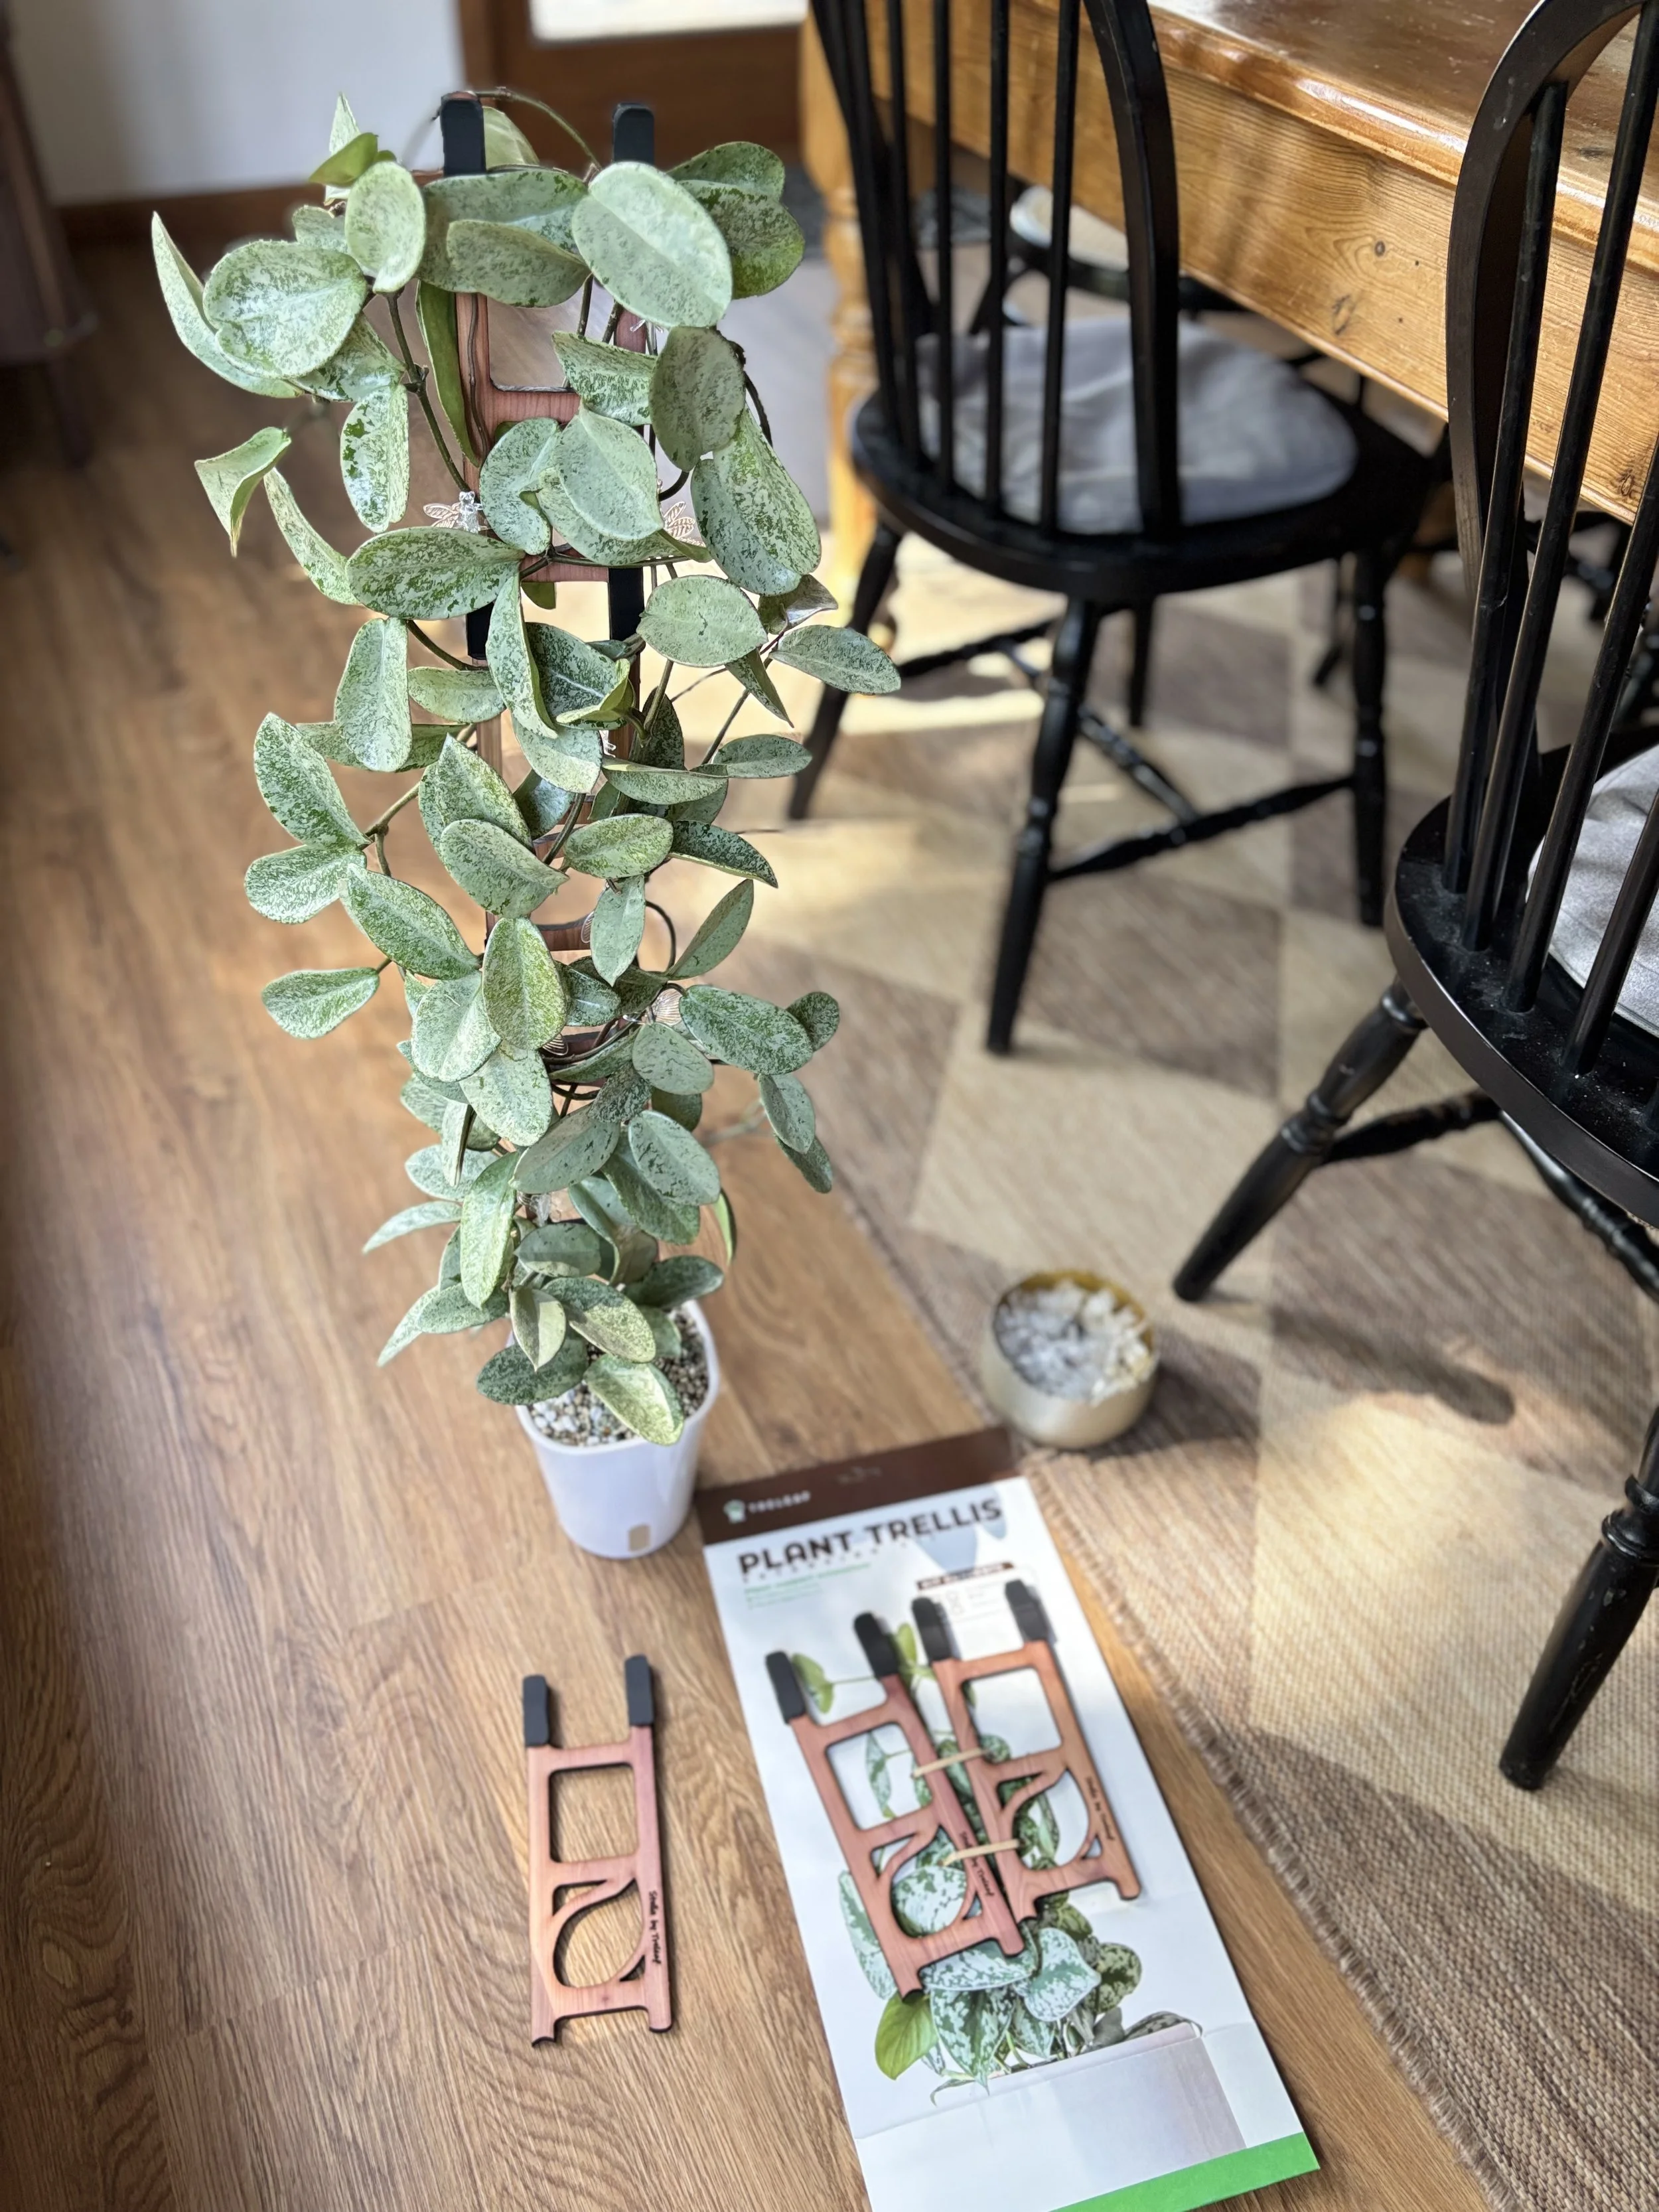
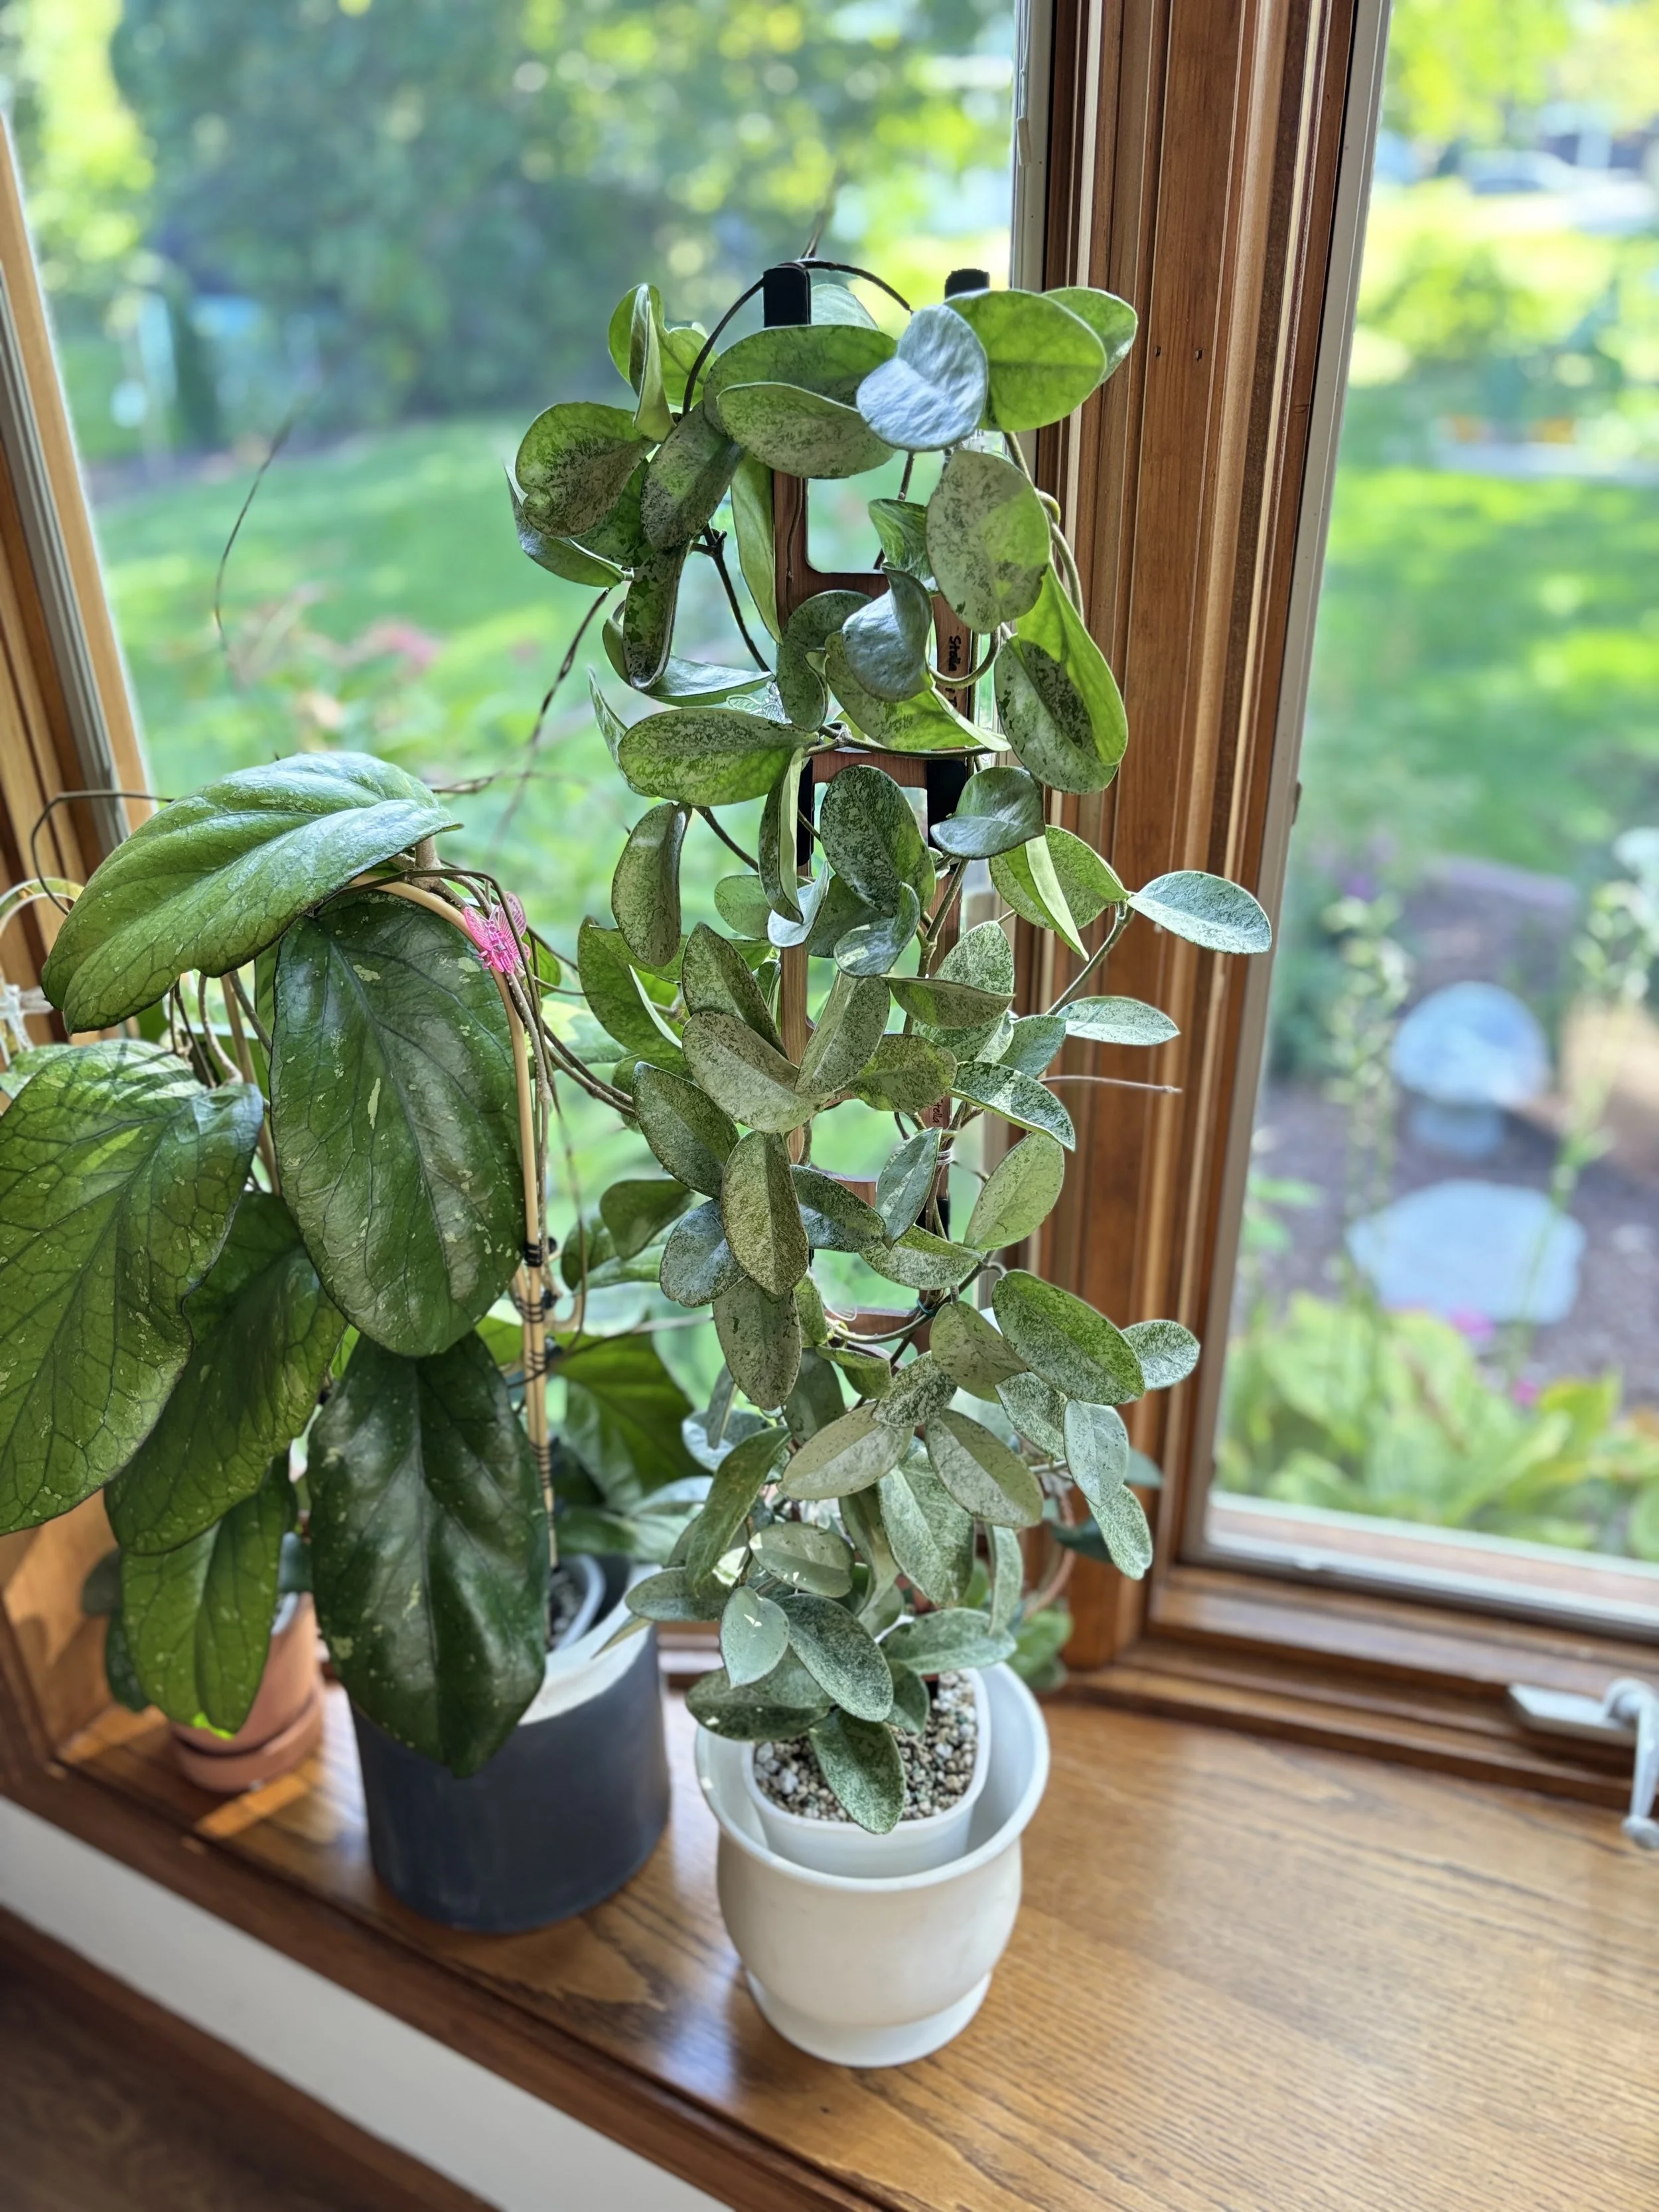
I’m incredibly happy with the result and I love that I still have extra supports to extend the plant vertically without having to commit to a taller trellis that would leave the top bare as you wait for more growth to come. I am totally planning to make this baby at least 2-3 extendables taller and will keep you guys updated on the growth on my Instagram!
Huge thank you to Treleaf for sponsoring this blog post, use the link below to get 10% off your order! If a vertical trellis isn’t the look you’re going for feel free to check out their site as they have a bunch of other cute shapes and styles for you to try out. All other products used in this post will be listed in the Products page.